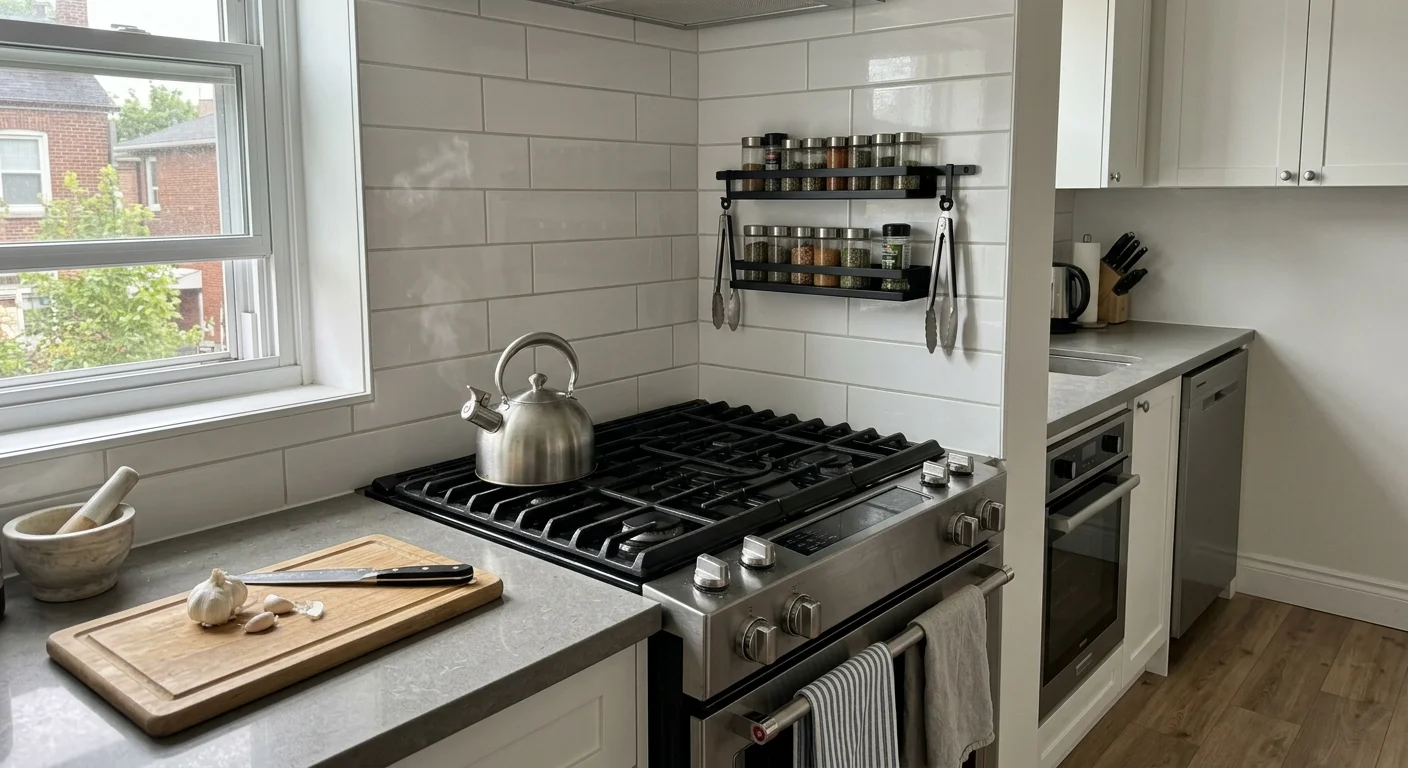
You can double your cooktop storage without risking your rental deposit or triggering a kitchen fire. When you have only 4 inches of clearance between your rear gas burners and the wall, standard organizers fail immediately.
Most adhesive peel-and-stick racks warp, detach, or drop contents into open flames because radiant heat degrades standard glues. True splash-zone safety requires hardware engineered to withstand thermal plumes and continuous temperatures exceeding 200°F.
This guide explains the mechanics of installing an apartment kitchen organizer directly behind active burners. You will learn how magnetic flux, adhesive shear strength, and thermal shielding keep your cookware secure without drilling holes.
The 4-Inch Clearance Trap: Thermal Hazards Behind Gas Ranges
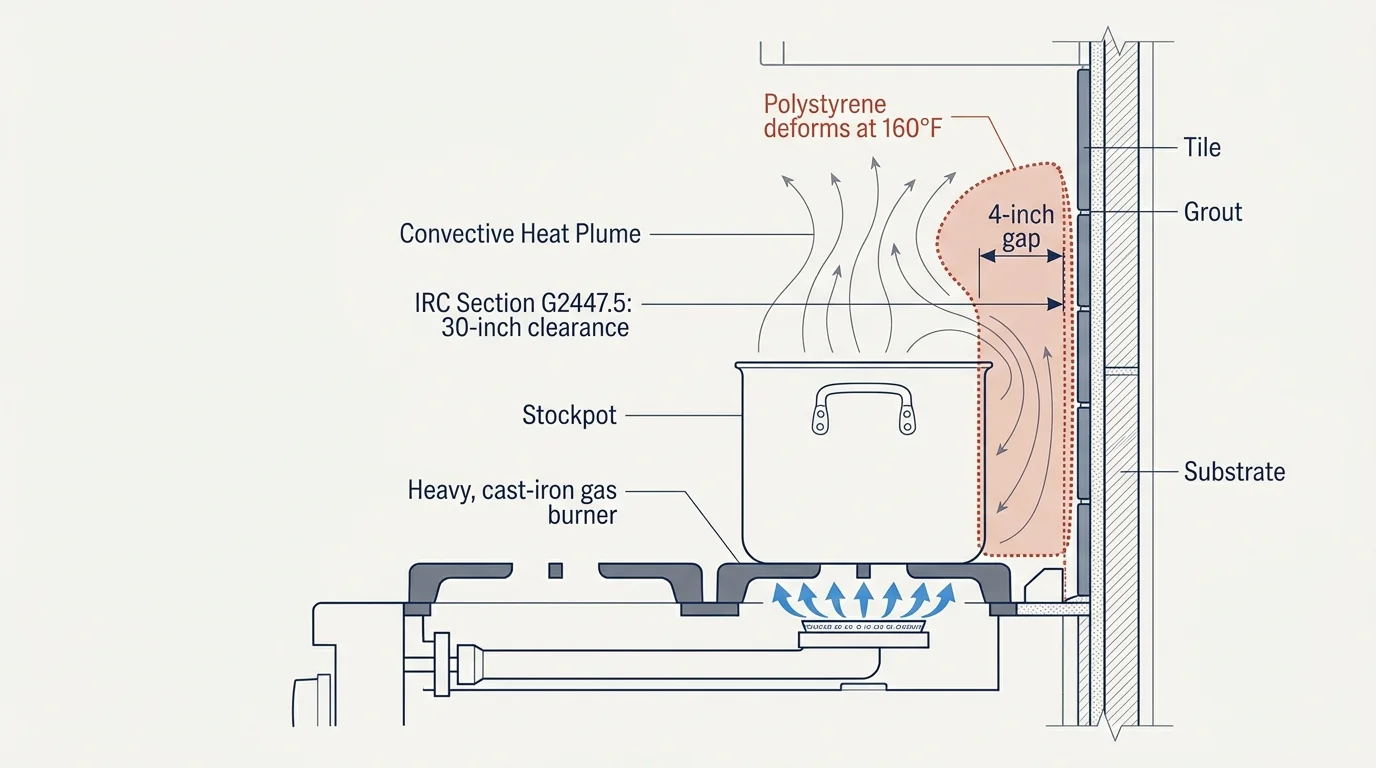
Gas cooktops produce convective heat plumes that rise along your backsplash wall. When a stockpot sits on a rear burner, flame deflection pushes superheated air backward into the narrow 4-inch gap.
Pairing your setup with a heavy-duty splatter screen further shields wall surfaces and stored items from airborne grease mist.
Model residential building codes, specifically IRC Section G2447.5 and NFPA 54, mandate a 30-inch vertical clearance between gas burners and unprotected combustible materials. That distance drops to 24 inches only when you have a certified range hood or non-combustible shielding.
Many renters try to reclaim dead space—unused storage areas, often in corners or above appliances—by sticking plastic caddies to backsplash tile. Doing this within 6 inches of gas grates creates an immediate fire hazard.
Plastics soften at surprisingly low temperatures; standard polystyrene deforms at roughly 160°F. When thin plastic brackets bend backward under the weight of spices, they dump jars directly onto open cast-iron grates.
“Unprotected combustible items placed inside the thermal boundary of a cooktop cause rapid heat accumulation. Safe kitchen organization relies on non-combustible materials and verified clearances.”
According to appliance durability research by Consumer Reports, rear gas burners regularly emit concentrated radiant heat that warms surrounding backsplashes beyond ambient room temperatures. You must account for these hot zones before mounting any shelf.
Material Physics: Magnets and Adhesives Under Heat Stress
Relying on generic hardware in high-heat zones leads to unexpected mechanical failure. Drill-free organizers depend on either magnetic attraction or structural adhesive tape, and both respond poorly to uncontrolled thermal exposure.
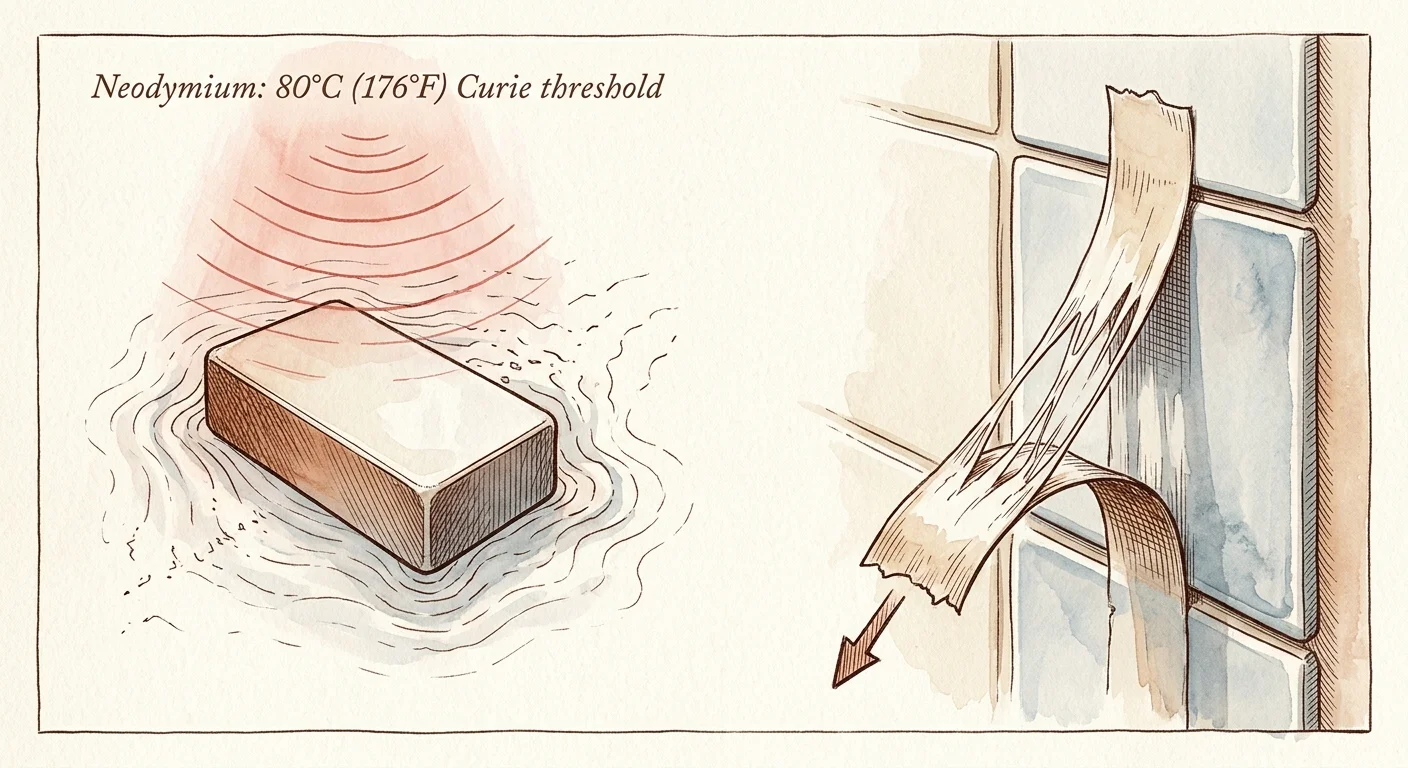
Neodymium (NdFeB) rare-earth magnets lose their magnetic field when heated past specific thresholds. Standard N-grade neodymium experiences permanent demagnetization at temperatures as low as 80°C (176°F).
Once a standard magnet overheats, its pull strength drops permanently, even after the metal cools down completely. A heat safe magnetic shelf for stove backsplashes requires high-temp H-grade or SH-grade magnets rated between 120°C and 150°C (248°F to 302°F).
Adhesive systems encounter an equally harsh environment behind gas cooktops. Standard double-sided foam tapes use rubber-based glues that liquefy and slide when exposed to heat and airborne cooking oils.
Heavy-duty acrylic foam tapes, such as 3M VHB, maintain structural hold up to 93°C (200°F) continuously and 149°C (300°F) for short spikes. High temperatures still decrease adhesive shear strength by softening the acrylic core.
Food-grade silicone provides the ideal thermal shield between the range and your mounting base. High-temperature silicone withstands continuous exposure up to 230°C to 260°C (450°F to 500°F) without cracking or conducting heat.
Using a silicone-encased base creates a thermal brake. This barrier protects your rare-earth magnets from the metal cooktop rim, keeping the magnetic core safely below its critical failure point.
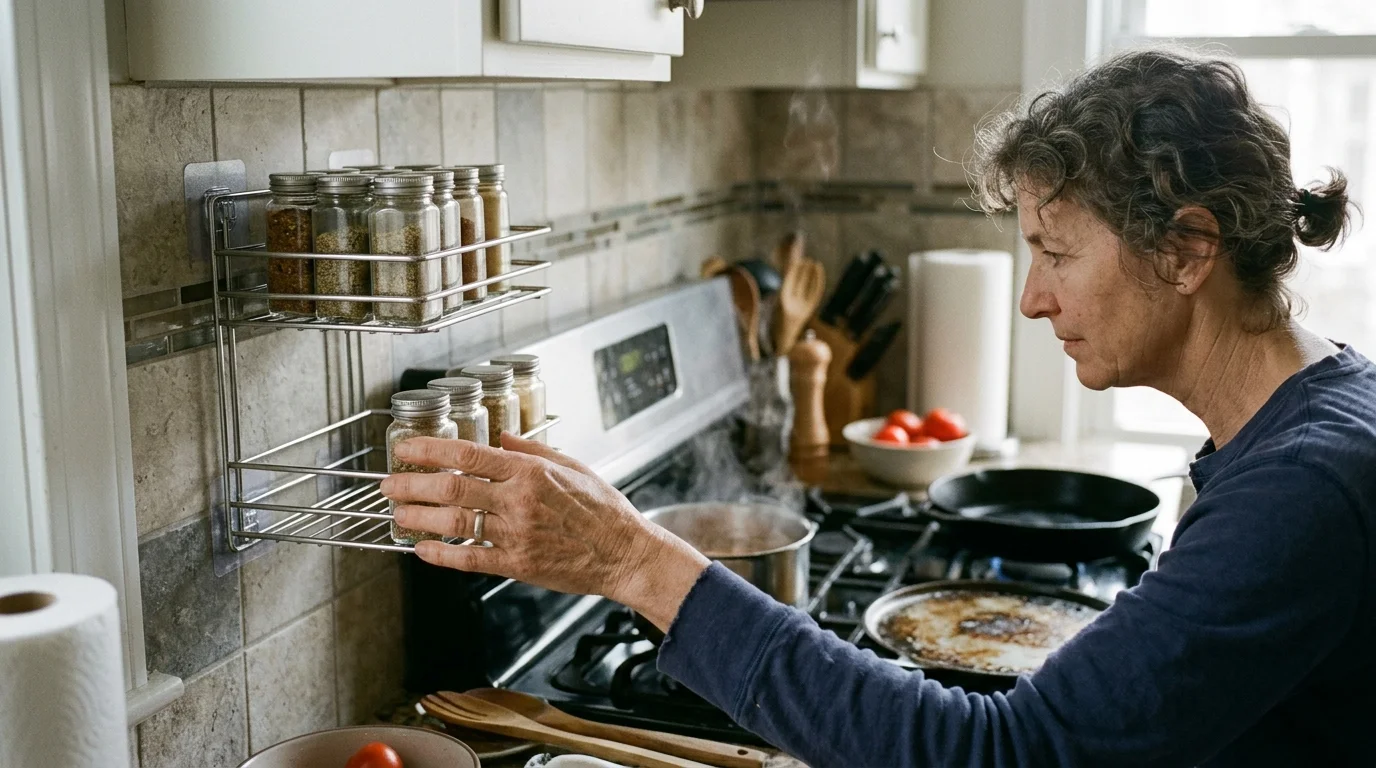
Evaluating Drill-Free Mounting Hardware for Splash Zones
Choosing the correct no drill kitchen storage back splash setup depends on your stove geometry and wall substrate. Freestanding ranges usually offer a steel back console, whereas slide-in ranges expose raw tile down to burner level.
Standard North American freestanding ranges measure 30 inches wide, while compact urban models measure 20 or 24 inches. Commercial-style ranges span 36 inches across.
To evaluate which hardware withstands gas cooking environments, review the measurable attributes below before committing your security deposit to an unverified product.
| Mounting System | Continuous Temp Limit | Max Weight Capacity | Minimum Clearance | Typical Cost |
|---|---|---|---|---|
| Silicone-Shielded Magnetic Shelf (e.g., StoveShelf 30-Inch) | 248°F (120°C) | 10 to 15 lbs | Zero (rests on range console) | $39 to $45 |
| High-Temp 3M VHB Acrylic Ledge (Stainless Steel) | 200°F (93°C) | 6 to 8 lbs | 4 inches above burner level | $25 to $35 |
| Telescopic Stainless Tension Pole System | 350°F (176°C) | 15 to 20 lbs | 2 inches lateral from grates | $45 to $65 |
| Unshielded N-Grade Magnetic Strip | 176°F (80°C) | 3 lbs (degrades rapidly) | 8 inches above burner level | $12 to $18 |
A renter friendly stove spice shelf resting on a metal rear console provides the highest stability. Products like the 30-inch by 3.5-inch StoveShelf utilize high-friction silicone pads over neodymium blocks to grip curved sheet metal.
If your slide-in gas cooktop sits flush against ceramic tile, tension-mounted stainless uprights perform better than chemical adhesives. Tension rods run from countertop to upper cabinetry, using compression rather than heat-sensitive glues.
As kitchen product testers at Wirecutter point out, durable organizers must clean easily without degrading under frequent degreaser applications. Stainless steel and silicone resist scouring chemicals far better than powder-coated plastics.
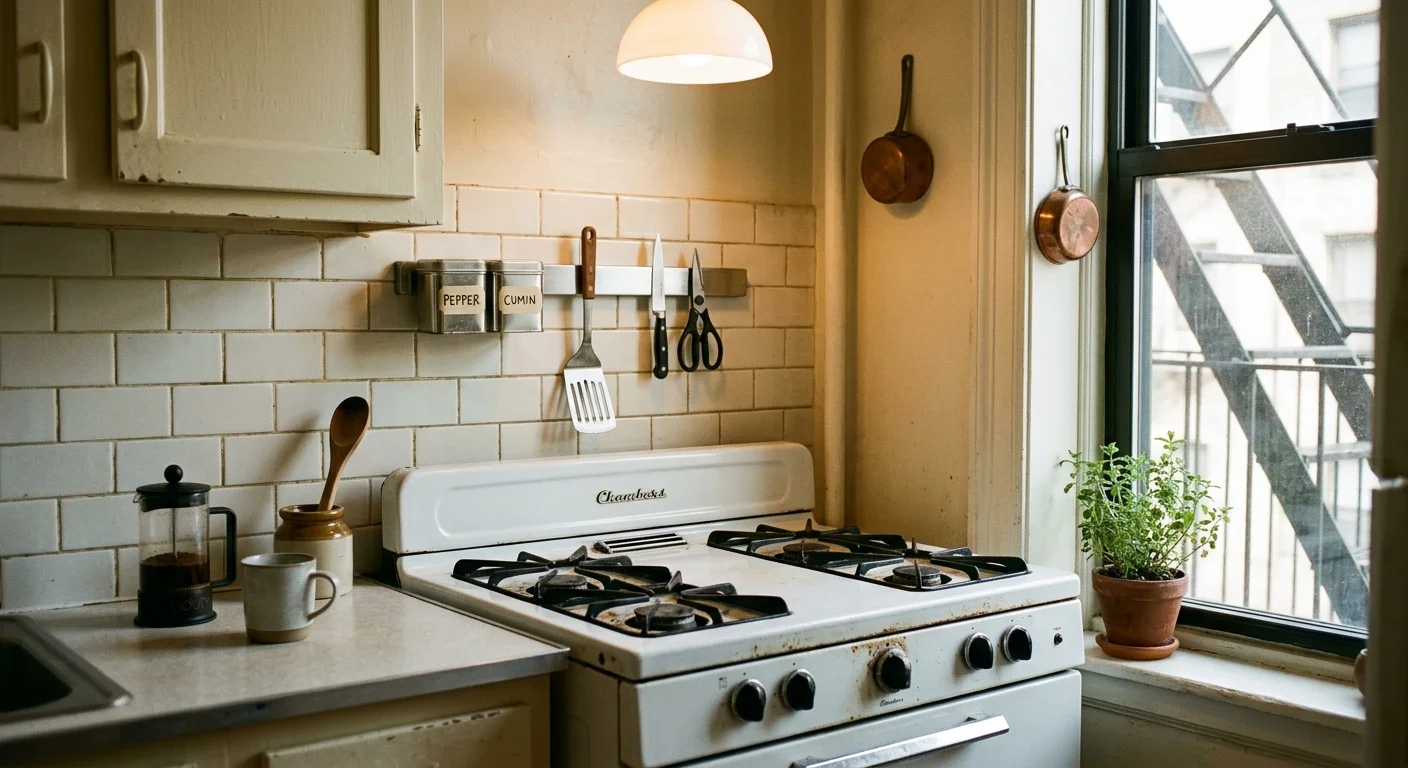
Worked Example: Equipping a 24-Inch Compact Range on a Budget
Consider an urban rental kitchen equipped with a 24-inch Premier gas range. The cooktop features two rear 9,000 BTU burners positioned exactly 3.75 inches away from a smooth glazed tile backsplash.
The tenant cannot drill into the tile and needs accessible seasoning storage without sacrificing counter space. Installing a generic 24-inch acrylic spice ledge with basic foam tape would cost $18 but risks adhesive failure under direct burner exhaust.
The tenant selects a 24-inch by 3.5-inch magnetic stainless steel console shelf for $36. Because the range console features a slight 0.25-inch curve, the tenant adds two high-temperature silicone leveling shims priced at $6.
The total hardware investment equals $42. Installation requires 12 minutes: 4 minutes to degrease the range console with isopropyl alcohol, 3 minutes to align the magnetic brackets, and 5 minutes to test load capacity.
The shelf holds eight 4-ounce glass jars filled with salt, whole peppercorns, and dried seasonings, weighing a combined total of 4.2 pounds. A 10-pound pull force magnet assembly ensures the shelf remains rigid when pulling items down.
During a 45-minute simmering test on the rear burner, the backsplash temperature hits 168°F. The silicone base dampens heat transfer, keeping the magnetic core at an acceptable 118°F.
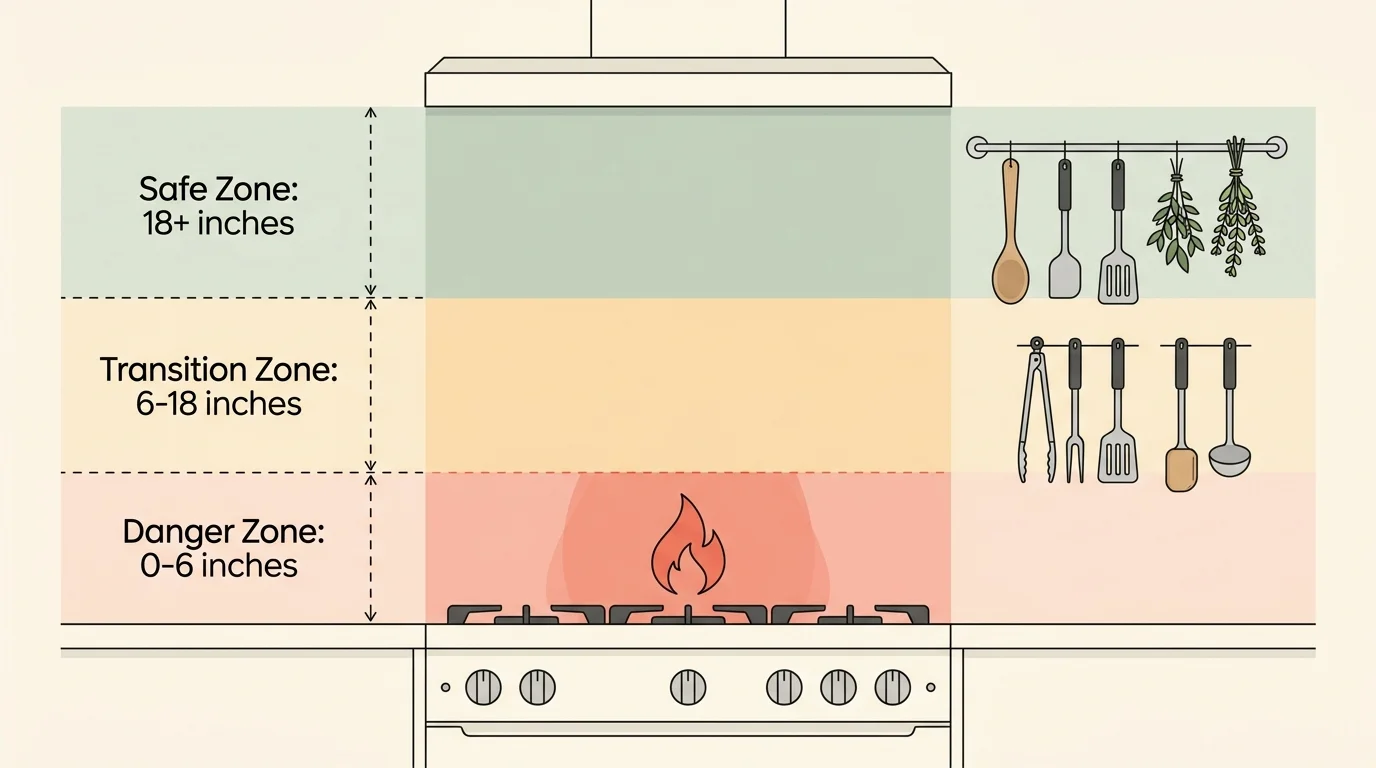
Heat Zone Mapping: Organizing Ingredients and Utensils Safely
Backsplash storage demands strict categorization based on heat sensitivity. Radiant heat destroys delicate volatile oils in food items, turning expensive spices flavorless within weeks.
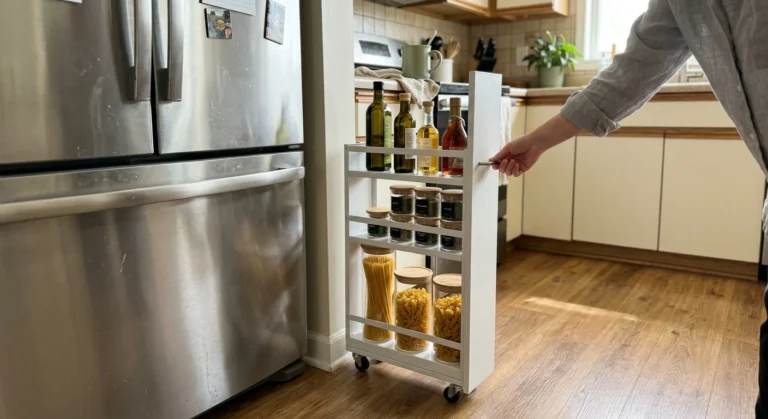
To safely store cooking oils that cannot tolerate cooktop heat, consider utilizing an ultra-slim rolling slide-out cart in the narrow gap beside your refrigerator instead.
Follow the culinary management principle of FIFO—first in, first out, a method of rotating food so oldest gets used first. Store active items on the shelf and backup inventory in cool cabinets.
Never store cooking oils, balsamic vinegars, or ground paprika directly behind active gas burners. Extended exposure to 110°F air oxidizes culinary oils, turning them rancid and unpalatable.
Reserve this splash zone for thermal-stable cooking tools and non-perishable ingredients. Coarse kosher salt, whole black peppercorns, metal tasting spoons, and stainless heat timers handle warm environments without breaking down.
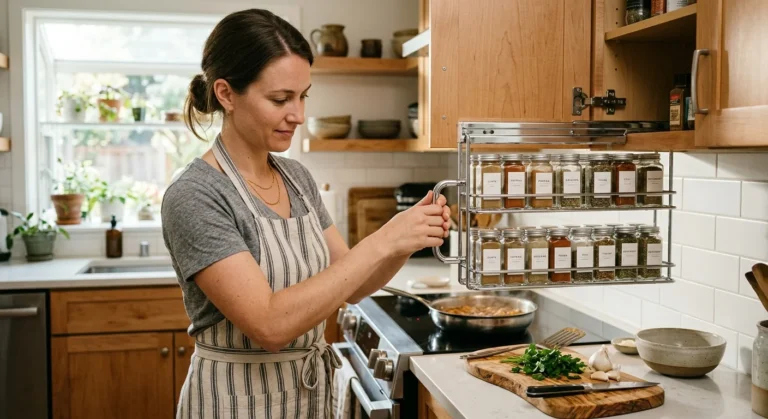
If your cooktop lacks upper clearance, install a pull-out organizer—a drawer or shelf that slides out for easy access—inside an adjacent base cabinet. This approach protects delicate spices from heat while keeping your cooking zone streamlined.
For upper cabinet interiors directly above the range, install a shelf riser—a mini shelf that creates two levels of storage in one space. This doubles vertical volume while protecting spices from ambient burner heat.
According to home storage recommendations from The Spruce, grouping everyday essentials into dedicated functional cooking zones prevents countertop clutter and saves meal prep time. Keep cooking grease off your bulk food reserves by isolating them from heat sources.
If you have wide perimeter counters, add a lazy susan—a rotating tray that makes corner cabinet items accessible—for supplemental condiment jars. This arrangement leaves your backsplash completely clear of clutter.
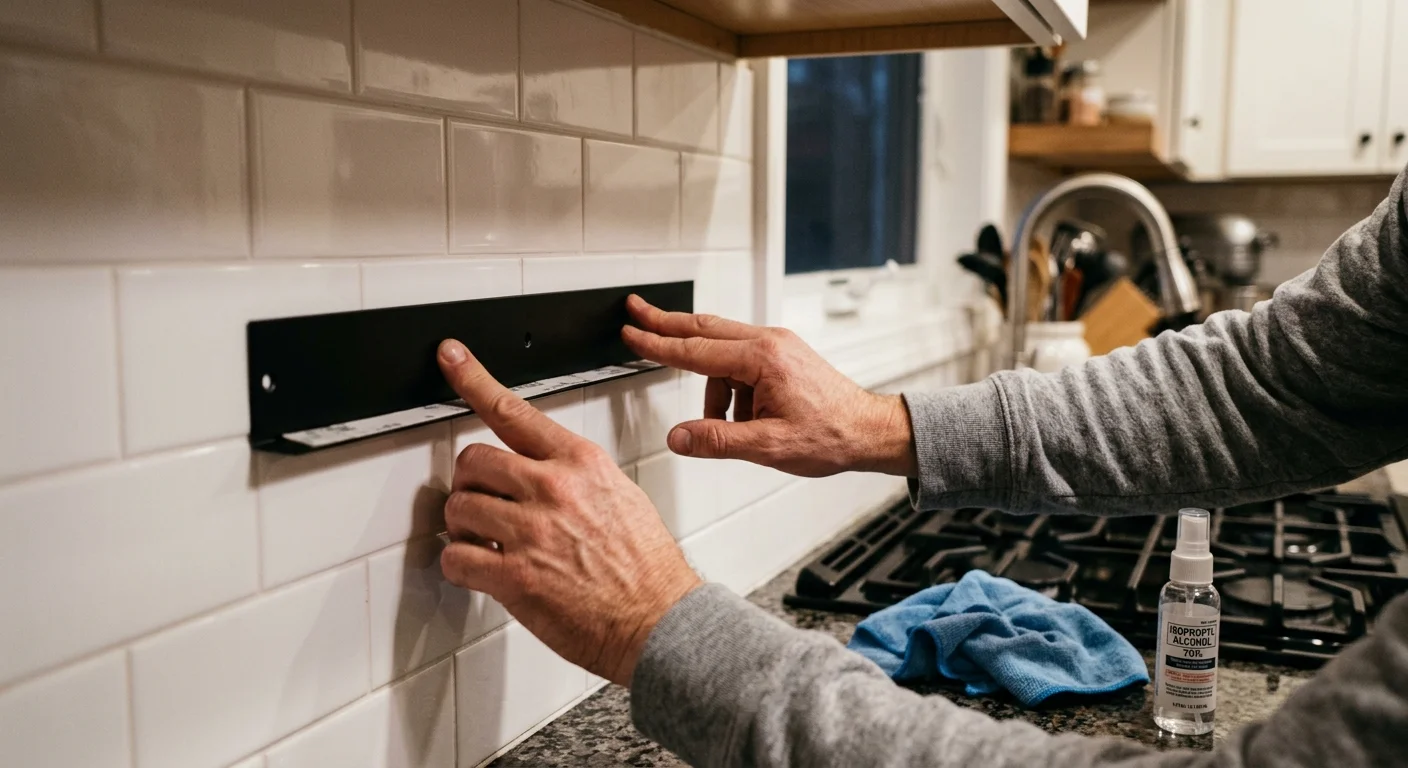
Step-by-Step Installation: Securing Racks to Rental Tile
Mounting an organizer behind gas burners requires meticulous surface preparation. Even the strongest 3M VHB tape or silicone pad slips if installed over microscopic grease films.
Begin by turning off all pilot lights or burner controls. Allow the range, grates, and surrounding tile surfaces to reach room temperature before starting your cleaning steps.
Wash the installation surface with a concentrated degreasing detergent, rinsing thoroughly with clean water. Dry the target surface completely using a clean microfiber cloth.
Wipe the installation zone with a 70% isopropyl alcohol solution to remove surfactant films left by cleaning soaps. Wait 3 minutes for the alcohol to flash off and dry completely.
If using an adhesive stainless ledge, unpeel the protective liner from the acrylic foam tape. Press the rack against the tile with firm, even pressure across the entire mounting strip for 60 seconds.
Allow the acrylic adhesive to cure undisturbed for a full 24 to 72 hours before placing items on the shelf. Acrylic bonds gain strength over time: 50% strength at 20 minutes, 90% at 24 hours, and 100% at 72 hours.
If installing a magnetic shelf on a freestanding range, position the magnetic feet flat against the steel console. Adjust the integrated leveling screws so the shelf sits dead flat, preventing circular jars from rolling toward burners.
Inspection Routines and Long-Term Thermal Maintenance
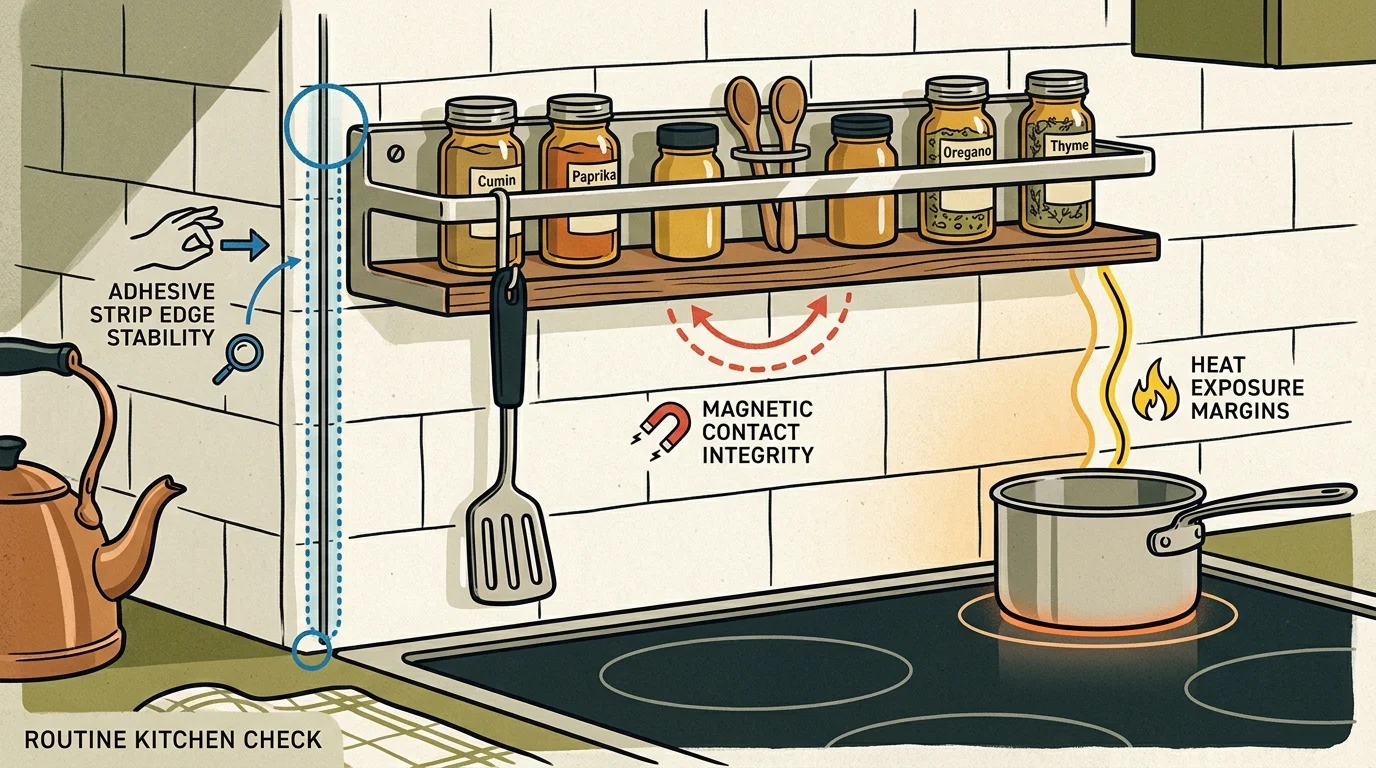
Kitchen hardware near open gas flames requires routine structural inspection. Aerated cooking grease mixes with ambient dust, creating sticky coatings that work their way beneath adhesives and magnetic contact points.
Inspect your drill-free rack once every 30 days during your deep cleaning schedule. Remove all containers and test the shelf for mechanical movement, tilt, or adhesive peel.
Examine the adhesive tape edges closely with a flashlight. If you notice the foam core stretching, bubbling, or gathering dark grease particles along its upper seam, remove the rack immediately.
Wash stainless steel shelves using warm water and mild dish soap. Avoid abrasive scouring pads that scratch protective mill finishes and invite moisture-induced surface corrosion.
Check the flexibility of silicone pads and magnet covers every six months. If the silicone feels brittle, stiff, or exhibits discoloration from heat, replace the barrier pads to prevent thermal bridging.
For additional cabinet organization, implement a door-mounted rack—storage that hangs on the inside of cabinet doors—for overflow items. You can also incorporate stackable—designed to safely pile on top of each other—acrylic bins inside your pantry shelves.
Organizing your kitchen with modular—pieces that can be combined and configured different ways—elements lets you adapt your layout whenever your cooking habits change. As detailed by Real Simple, adaptable storage systems prevent clutter from reforming over time.
Frequently Asked Questions
Will high heat from rear gas burners cause a magnetic shelf to fall?
Standard N-grade neodymium magnets lose magnetic pull permanently when exposed to temperatures exceeding 176°F. High-temperature magnetic shelves wrapped in silicone remain stable up to 248°F, preventing accidental detachment.
Can I safely mount an adhesive spice rack directly over a gas range?
You can use heavy-duty acrylic foam tapes like 3M VHB if you maintain at least 4 inches of clearance above burner grates. Standard consumer foam tapes melt quickly, creating fire risks.
What can I safely store on a backsplash shelf behind active flames?
Store non-flammable, heat-tolerant items like coarse cooking salt, whole peppercorns in glass containers, metal spoons, and stainless timers. Avoid plastic squeeze bottles, cooking oils, and delicate ground spices.
How do I remove high-bond adhesive racks when moving out of an apartment?
Warm the adhesive bracket with a handheld hair dryer for 90 seconds to soften the acrylic foam core. Slice through the foam layer using dental floss or nylon fishing line, then remove residual glue with citrus cleaner.
Disclaimer: Product prices and availability change frequently. Prices shown were accurate at time of writing but may have changed. We may earn a small commission from purchases made through links on this site, at no extra cost to you. Always measure your space before purchasing organizers to ensure proper fit.