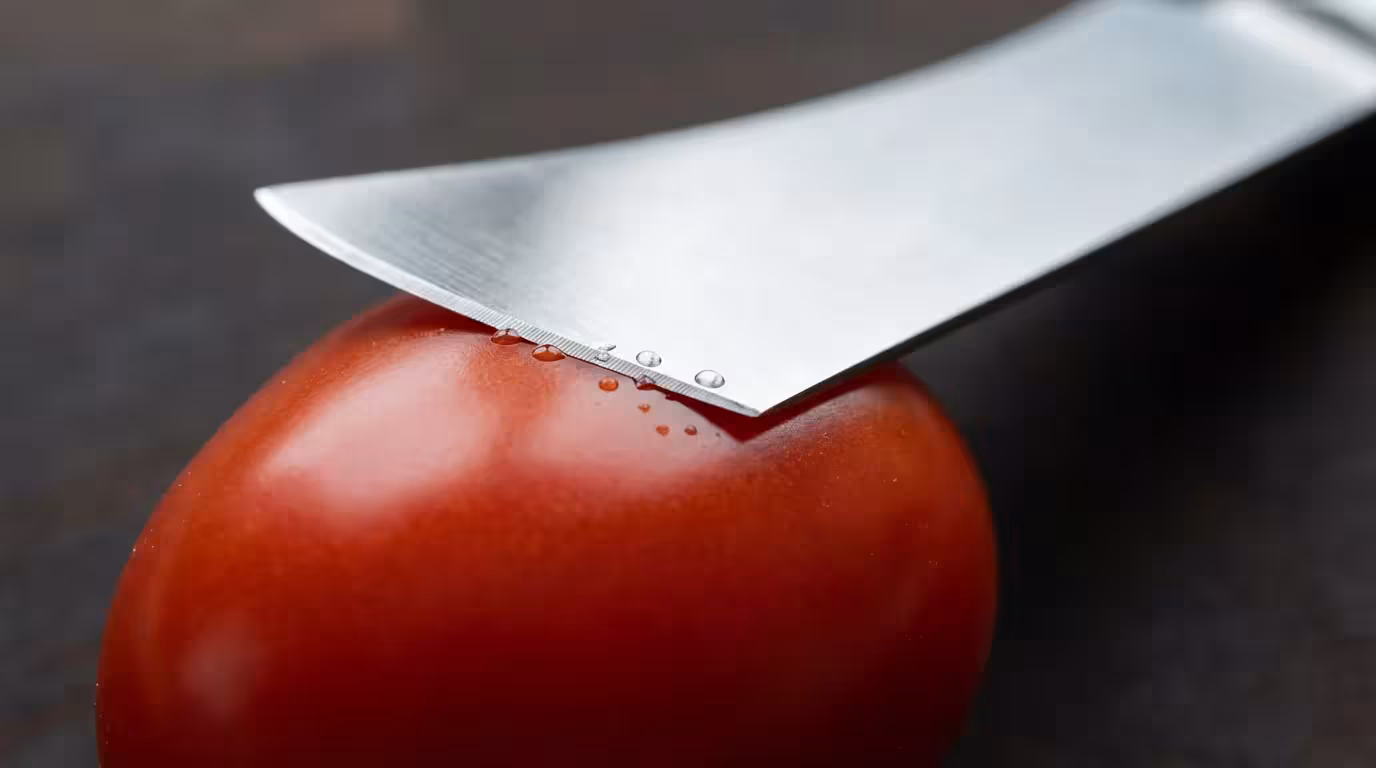
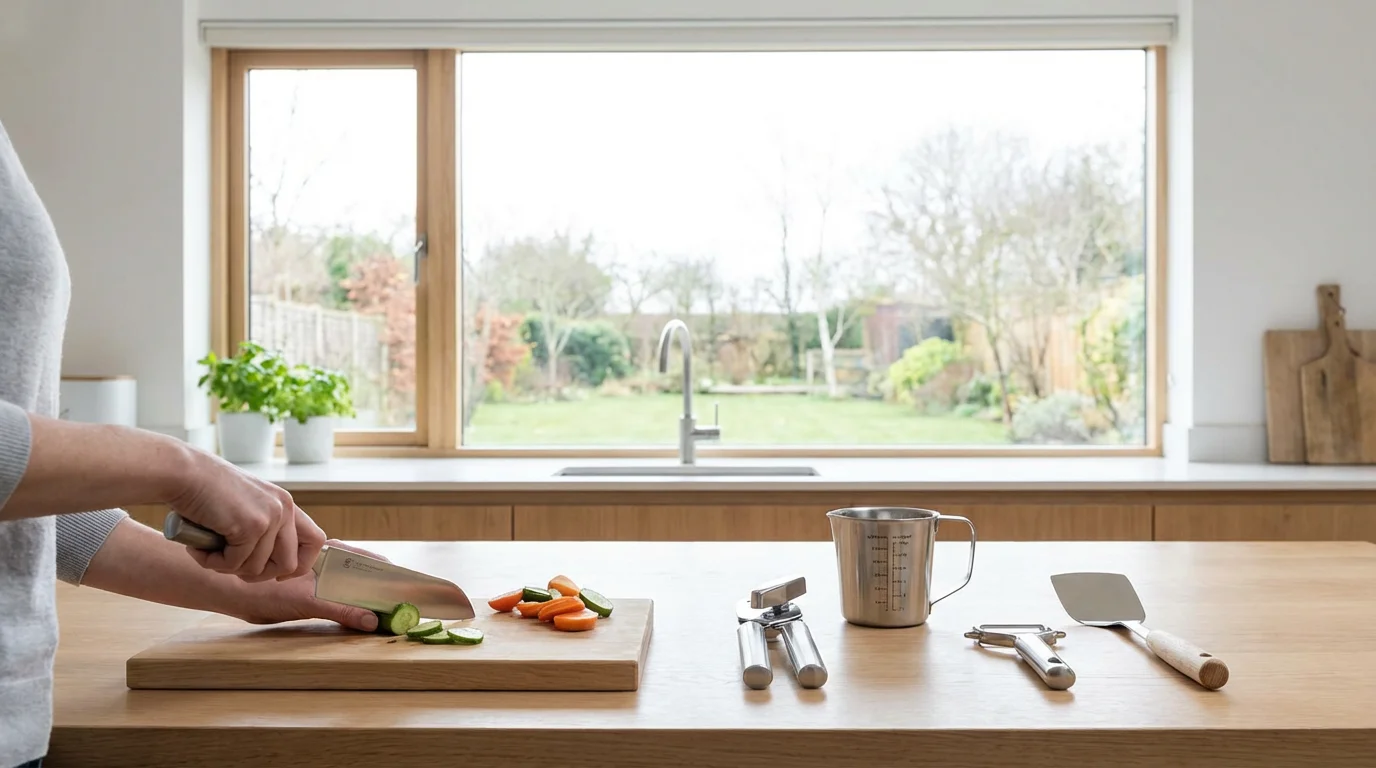
Every home cook knows the frustration of a dull knife. You press down on a tomato, and instead of slicing cleanly, the blade slides off the skin or squashes the fruit into a messy pulp. More importantly, a dull knife is a dangerous knife. When a blade loses its edge, you have to apply more pressure, increasing the likelihood that the knife will slip and cause an injury.
Before filling your drawers, it is wise to distinguish between essential tools and kitchen gadgets you don’t need to avoid clutter.
The solution seems simple: keep your knives sharp. However, traditional sharpening methods—like whetstones—require patience, steady hands, and a significant learning curve. Enter the electric knife sharpener. These gadgets promise razor-sharp edges in seconds with zero skill required. But do they deliver on that promise? And more importantly, will they ruin your expensive cutlery in the process?
If you are looking to streamline your meal prep and improve kitchen safety, understanding the pros, cons, and mechanics of electric sharpeners is essential. We will break down everything you need to know to decide if this tool earns a spot on your counter.
How Electric Sharpeners Work
To understand if an electric sharpener is “worth it,” you first need to understand what is happening inside the machine. Unlike manual methods where you control the angle and pressure, an electric sharpener automates the geometry of the edge.
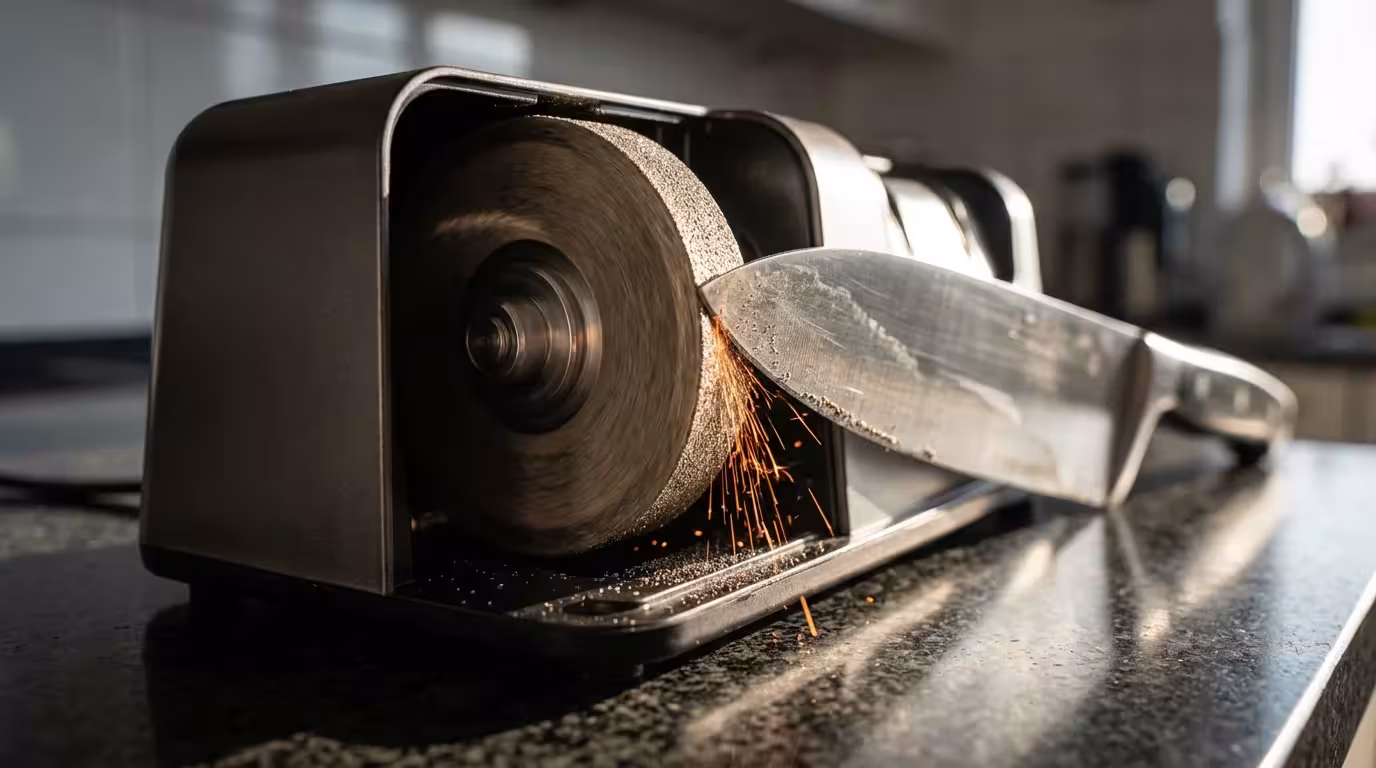
Most modern electric sharpeners utilize a multi-stage process involving spinning abrasive disks. These disks are typically coated with diamond abrasives, which are hard enough to grind down steel alloys effectively. The machine uses slots with precise angle guides—plastic or spring-loaded barriers that hold your knife at the correct position against the grinding wheel.
The motor spins these wheels at high speeds. When you pull the knife through the slot, the abrasive removes metal to create a new edge. This is a crucial distinction: electric sharpeners work by removing metal. They physically grind away the old, dull steel to reveal a fresh, sharp edge underneath.

Sharpening vs. Honing: Knowing the Difference
Before diving deeper, we must clear up a common misconception in the kitchen: the difference between sharpening and honing. Many home cooks use these terms interchangeably, but they refer to two completely different maintenance tasks.
- Honing: This is what you do with a honing rod (often mistakenly called a sharpening steel). When you use a knife, the microscopic edge bends and curls slightly out of alignment. Honing pushes that metal back into a straight line. It does not remove metal; it realigns the edge. You should hone your knife every few times you use it.
- Sharpening: This process grinds metal off the blade to create a new bevel (the angled edge that cuts). You only need to sharpen a knife when honing no longer restores the edge—typically once or twice a year for home cooks, depending on usage.
“Think of honing like brushing your teeth and sharpening like going to the dentist. You brush daily to maintain, but you need the professional tools for the deep restoration.” — Professional Knife Sharpener
Electric sharpeners are primarily for sharpening, though high-end models often include a final “stropping” or polishing stage that functions similarly to honing. If you use the coarse grinding stage daily, you will whittle your chef’s knife down to a toothpick in a few years.
The Advantages: Speed and Consistency
Why do so many home cooks swear by these machines? The benefits are practical and immediate.
Efficient tools like electric sharpeners and the best vegetable peelers can drastically reduce your time spent in the kitchen.
1. Zero Learning Curve
Using a whetstone (a rectangular block of stone used for manual sharpening) is an art form. It requires holding the knife at a consistent 15 or 20-degree angle by hand while moving it across the stone. If your hand wobbles, you can dull the knife further or scratch the blade face. Electric sharpeners eliminate this variable. The guides lock the knife into the correct angle for you. If you can pull a knife through a slot, you can get a sharp edge.
2. Speed and Efficiency
Time is often the biggest barrier to meal prep. According to Wirecutter, manual sharpening on stones can take 20 to 30 minutes per knife for a beginner. An electric sharpener can restore a dull blade in less than two minutes. For a busy parent trying to get dinner on the table, this efficiency is invaluable.
3. Restoration Power
If you have old knives rattling around in a drawer that are nicked, chipped, or completely blunt, a honing rod won’t fix them. An electric sharpener has the motor power and coarse abrasives necessary to grind out small chips and reshape a damaged edge quickly.
The Drawbacks: Metal Removal and Lifespan
While convenient, electric sharpeners are not perfect. There are specific trade-offs you make for that convenience.
A sharp knife is a general-purpose essential, but for specific tasks, you might prefer avocado tools like slicers and pitters for speed and safety.
1. Aggressive Metal Removal
Because they are powered by motors, these machines remove steel much faster than manual methods. If you get distracted and pull the knife through too many times, or if you press down too hard, you can grind away a significant portion of the blade. Over years of regular use, an electric sharpener will reduce the width of your knife (the distance from the spine to the edge) faster than water stones will. This eventually alters the knife’s geometry, making the part of the blade near the bolster (the thick junction between handle and blade) interfere with cutting on a board.
2. Edge Quality
While an electric sharpener creates a sharp edge, it is not a polished edge. If you look at the blade under a microscope, an edge sharpened on a machine often has tiny micro-serrations. For slicing tomatoes or crusty bread, this “toothy” edge is actually fantastic. However, for pushing straight down through a vegetable (push-cutting) or shaving thin slices of fish, it is less smooth than the mirror-polish edge achieved by high-grit stones.
3. Limited Flexibility
Most electric sharpeners are set to specific angles. If you have a custom knife, a cleaver with a thick bevel, or a specialized single-bevel Japanese slicer, a standard electric sharpener might ruin the blade profile because you cannot adjust the angle of the grinding wheels.
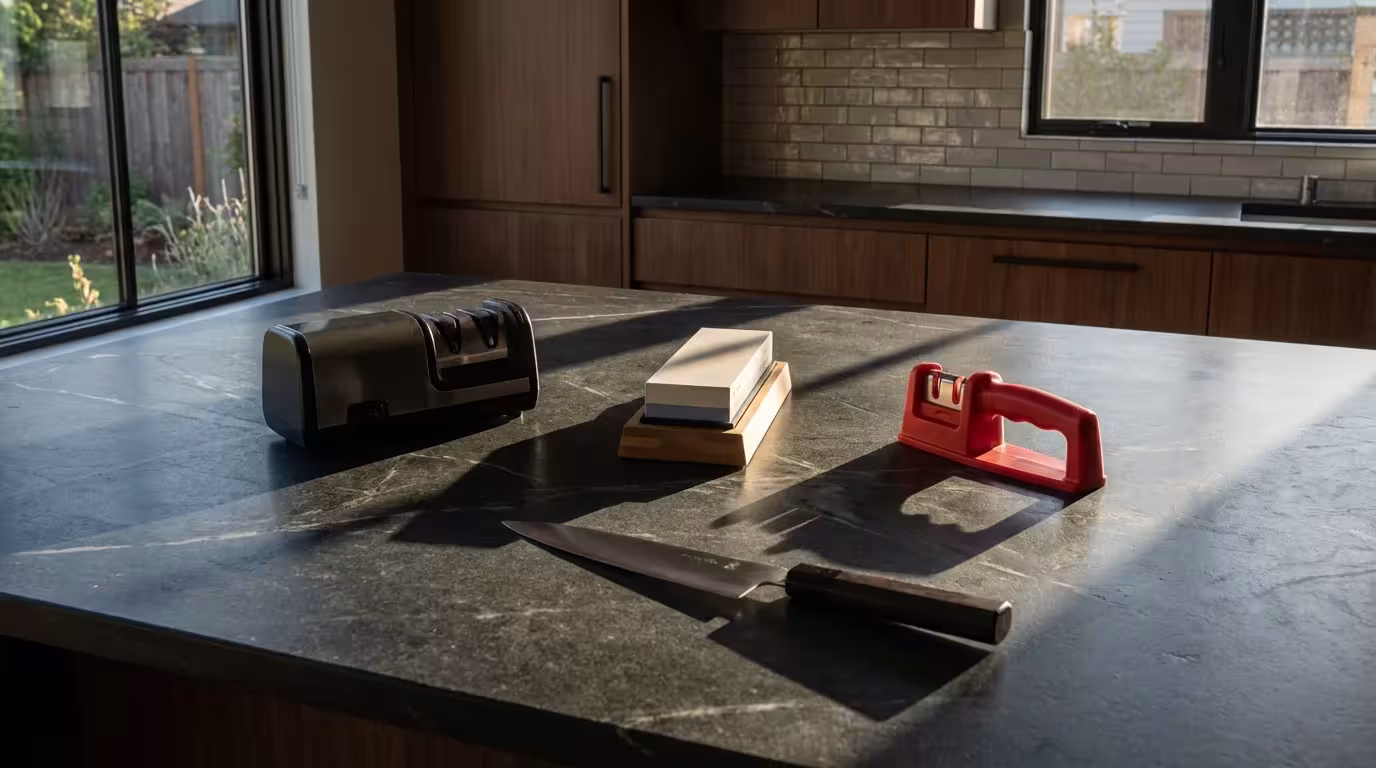
Comparison: Electric vs. Manual Methods
To help you visualize where electric sharpeners fit in the ecosystem of kitchen tools, we have compared the three most common sharpening methods.
While machines are great for general tasks, smaller paring knives for detailed kitchen work might still benefit from the precision of manual honing.
| Feature | Electric Sharpener | Manual Pull-Through | Whetstones |
|---|---|---|---|
| Speed | Fastest (1-2 mins) | Fast (2-3 mins) | Slow (15-45 mins) |
| Skill Required | Low | Low | High |
| Edge Quality | Very Sharp (Micro-serrated) | Acceptable (Often scrapes metal) | Superior (Polished/Razor) |
| Knife Lifespan | Moderate (Removes metal quickly) | Low (Carbide cutters strip steel) | High (Removes minimal metal) |
| Best For | Daily workhorse knives | Emergency fixes only | Expensive/Delicate knives |
Note on Manual Pull-Throughs: Avoid the cheap handheld sharpeners with “V” shaped carbide blades. Unlike electric sharpeners with spinning wheels, these manual devices literally peel strips of steel off your knife lengthwise. They result in a jagged edge and ruin knives quickly. If you want convenience, electric is safer for your knife than manual carbide pull-throughs.

European vs. Japanese Knives
Before purchasing a sharpener, you must identify what kind of knives you own. The geometry of the blade dictates which machine you need.
If you find that even a sharp knife isn’t giving you the paper-thin results you want, the best mandoline slicers for safe uniform cuts are a great alternative for consistency.
European/Western Knives
Brands like Wusthof, Henckels, and Mercer generally use softer steel and are sharpened to a 20-degree angle on each side. These knives are robust and heavy. Most standard electric sharpeners are designed for this 20-degree angle.
Japanese/Asian Style Knives
Brands like Shun, Global, and Miyabi use harder steel and are sharpened to a much finer 15-degree angle. This makes them sharper but more brittle. If you put a 15-degree Japanese knife into a 20-degree electric sharpener, you will grind off the delicate edge and make the knife duller and thicker.
Fortunately, many modern electric sharpeners, such as high-end models from Chef’sChoice, now offer convertible slots (both 15 and 20 degrees) or are specifically designed for Asian-style blades. Always check your knife brand’s specifications before grinding.
Key Features to Look For
Not all electric sharpeners are created equal. When shopping, look for these specific features to ensure you get a tool that protects your investment.
Just as an electric sharpener simplifies blade maintenance, finding the best can openers for easy use can remove other small points of frustration in your kitchen.
Understanding how to spot quality kitchen tools will help you determine if your current cutlery is high-quality enough to warrant a professional-grade sharpener.
- Diamond Abrasives: Look for 100% diamond abrasives. Diamond is the hardest material on earth and cuts steel efficiently without generating excessive heat that could damage the blade’s temper.
- Multiple Stages: A good sharpener should have at least two, preferably three stages.
- Stage 1 (Coarse): For very dull or damaged knives.
- Stage 2 (Fine): For routine sharpening.
- Stage 3 (Stropping/Polishing): For finishing the edge and daily maintenance.
- Precision Angle Guides: Avoid machines with loose slots where the knife can wiggle. Look for flexible, spring-loaded guides that hold the knife tight against the wheel.
- Cleanability: Metal filings (dust) will accumulate inside the machine. Look for a model with a magnetic catch tray or an easy-to-clean access panel.
Serious Eats suggests that while electric models are an investment, the cost is justified by the sheer improvement in safety and prep speed for the average home cook.
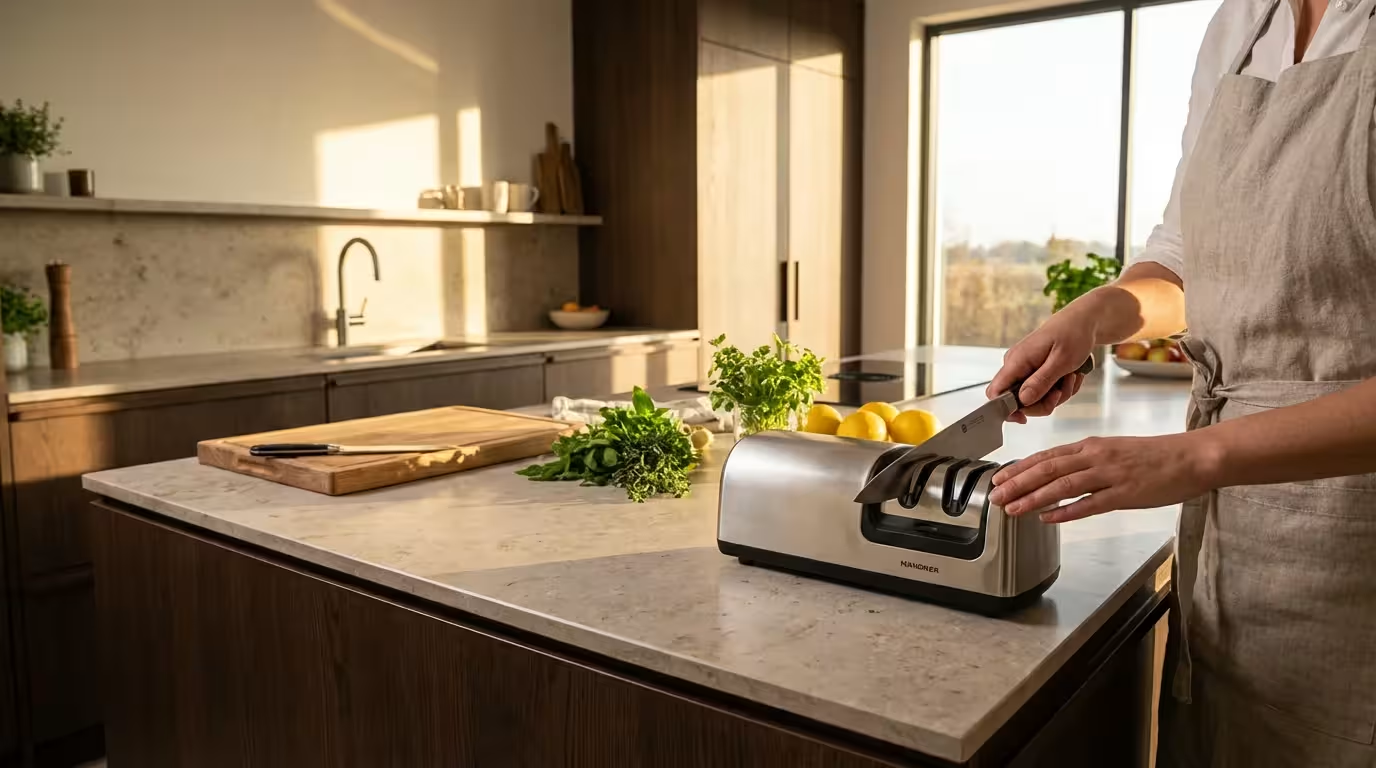
How to Use an Electric Sharpener Safely
Even though the machine does the work, your technique matters. Improper use can gouge the blade or result in an uneven edge.
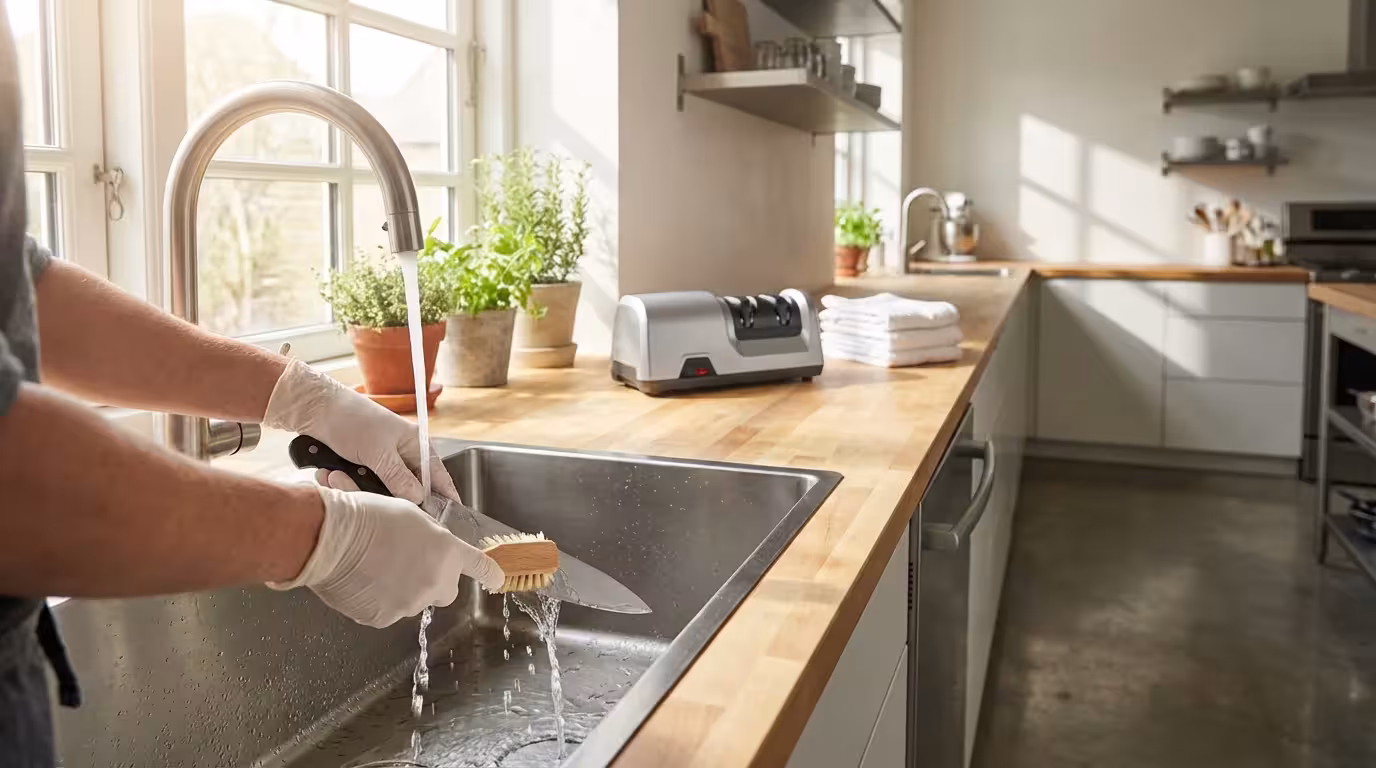
1. Clean and Dry the Knife: Never sharpen a dirty knife. Grease or food particles can clog the abrasive wheels. Wash and fully dry the blade first.
2. Start with the Right Stage: If your knife is just slightly dull, skip the coarse stage and go straight to fine or polishing. Only use the coarse stage once or twice a year or for damaged blades.
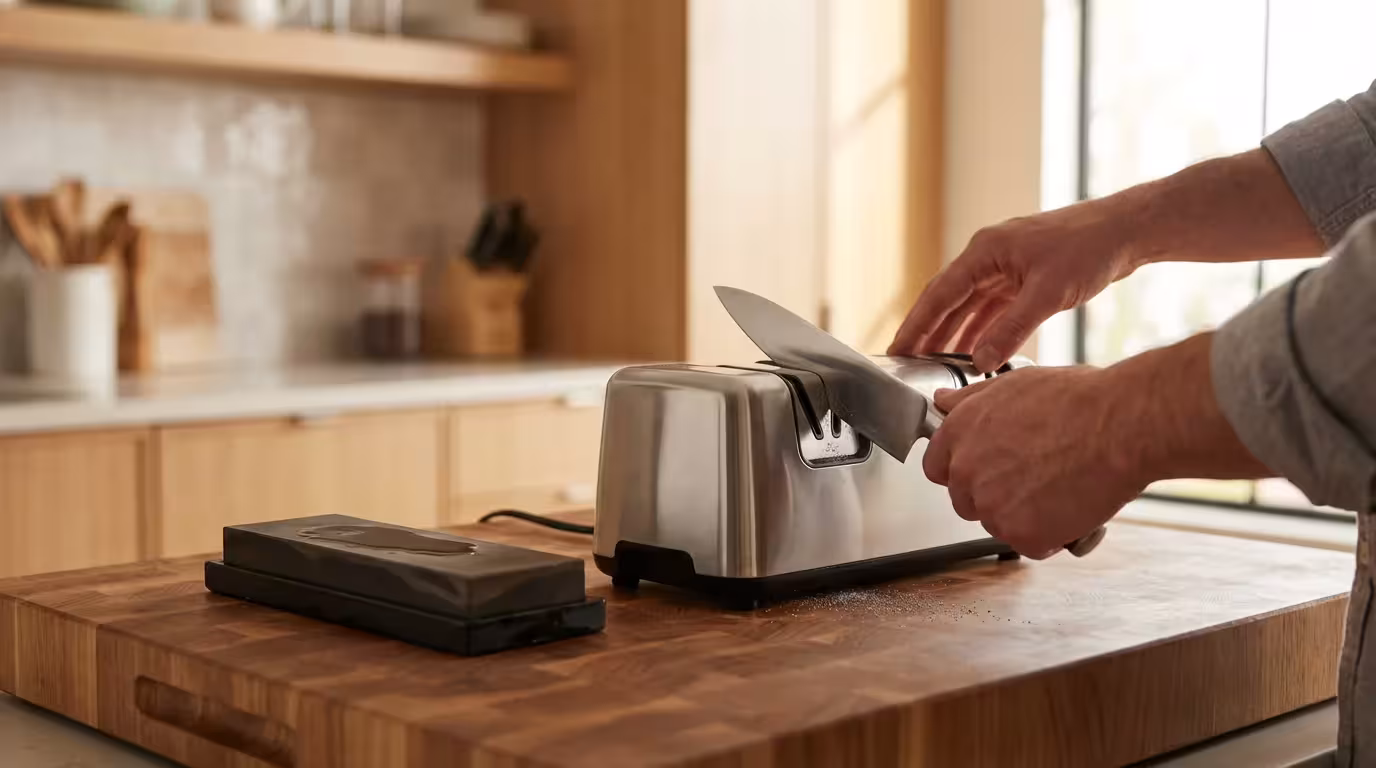
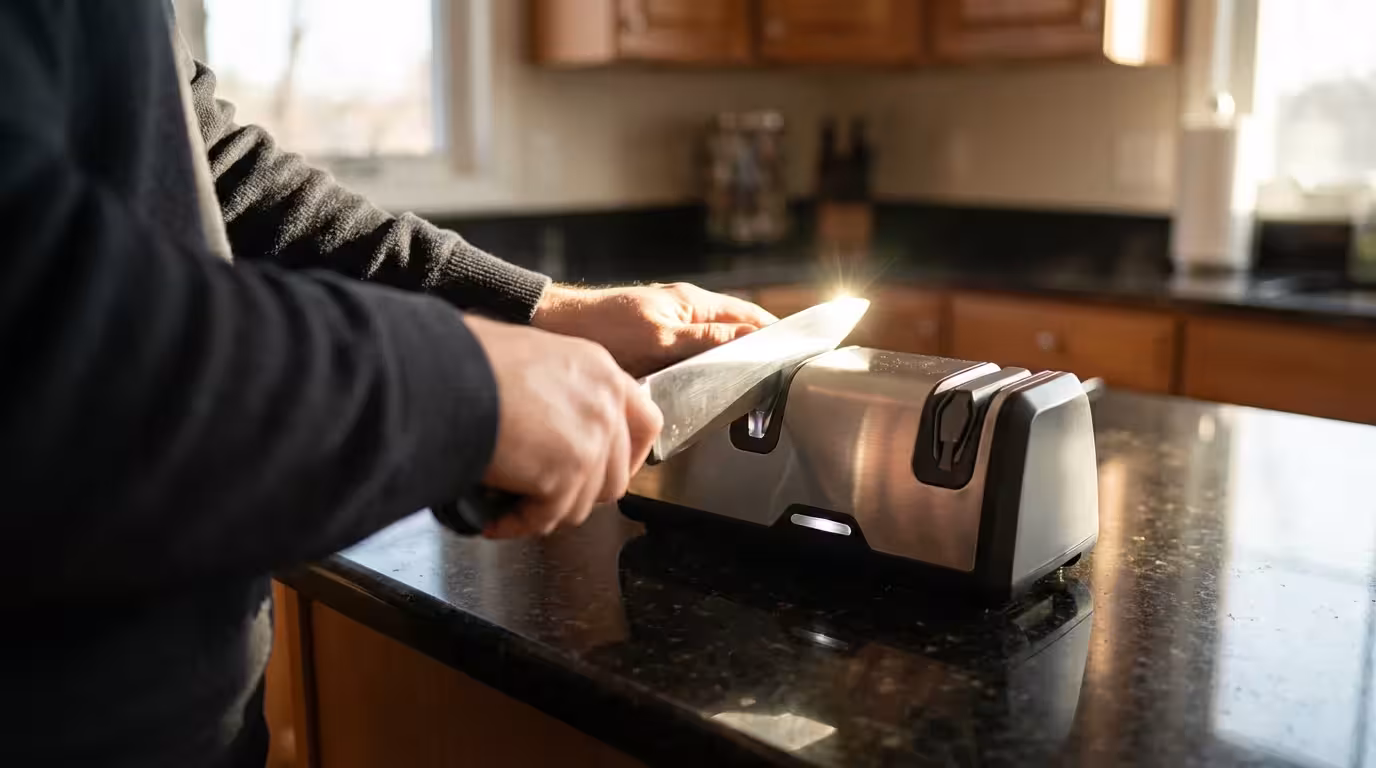
3. Use Light Pressure: This is the most common mistake. Do not push down. The weight of the knife is usually enough. Let the motor spin the wheels; your job is simply to guide the knife.
4. The Pull-Through Motion:
- Insert the knife heel (the back of the blade) into the slot.
- Pull the knife steadily toward you, lifting the handle slightly as you reach the curved tip of the blade to ensure the tip is sharpened.
- Alternating sides is key. Pull through the left slot, then the right slot. Repeat based on the manufacturer’s instructions (usually 2-5 pairs of pulls).
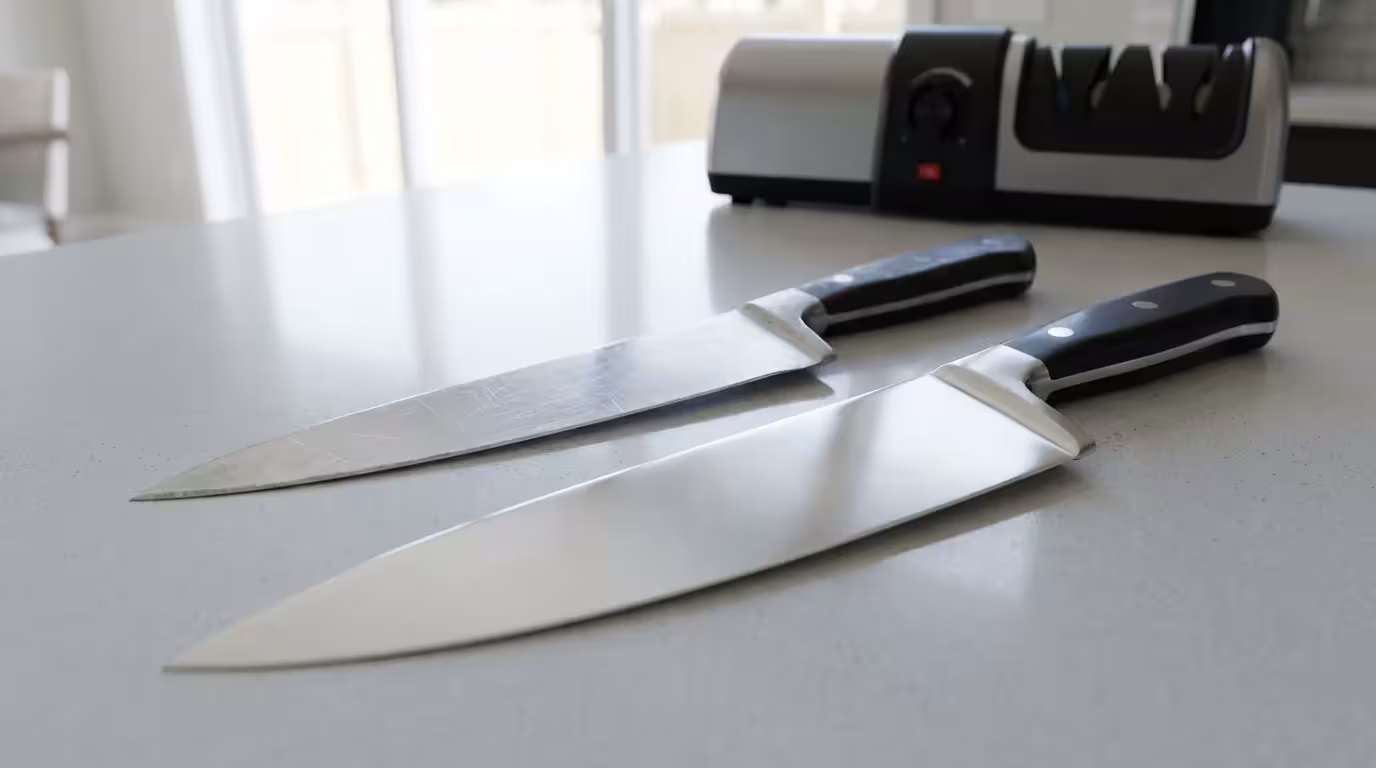
5. Test the Edge: Wipe the blade to remove metal dust. Test sharpness by slicing a piece of paper. It should slice cleanly without tearing. If it tears, do a few more passes on the finest stage.
Frequently Asked Questions
Can I sharpen serrated knives (like bread knives) in an electric sharpener?
Generally, yes, but with caution. You typically use only the final “polishing” or stropping stage for serrated knives. This stage straightens the teeth without grinding them off. Never put a serrated knife into the coarse grinding stage, or you will remove the serrations and ruin the knife.
Do electric sharpeners ruin knives?
They do not “ruin” knives in the short term, but they do reduce the lifespan of a knife compared to whetstones. Because they remove more metal, your knife will wear down faster over many years. However, for standard kitchen knives (Victorinox, Wusthof, Mercer), the trade-off for a sharp, usable knife is usually worth it.
How often should I use my electric sharpener?
You should not use the electric sharpener every time you cook. Use a honing rod for daily maintenance. Use the electric sharpener (specifically the fine or polishing stage) only when the honing rod stops being effective, perhaps once every 1-3 months depending on usage.
Can I use an electric sharpener on scissors?
Only if the specific model has a designated slot for scissors or shears. Knife blades and scissor blades have different geometries. Putting scissors in a knife slot will damage the scissors so they no longer cut.
The Final Verdict
So, are electric knife sharpeners worth it? For the vast majority of home cooks, the answer is a resounding yes. If you are currently cooking with dull knives because you don’t have the time or skill to use whetstones, an electric sharpener will immediately improve your cooking speed and safety.
They are best suited for robust, Western-style knives used for daily meal prep. However, if you are a knife hobbyist with a collection of hand-forged Japanese blades costing hundreds of dollars each, stick to whetstones or professional sharpening services to preserve the steel. For everyone else, the convenience of having a razor-sharp edge in under two minutes is a luxury that quickly becomes a necessity.
Disclaimer: Product prices and availability change frequently. Prices shown were accurate at time of writing but may have changed. We may earn a small commission from purchases made through links on this site, at no extra cost to you. Always use cutting tools carefully and follow manufacturer safety guidelines.


Leave a Reply