
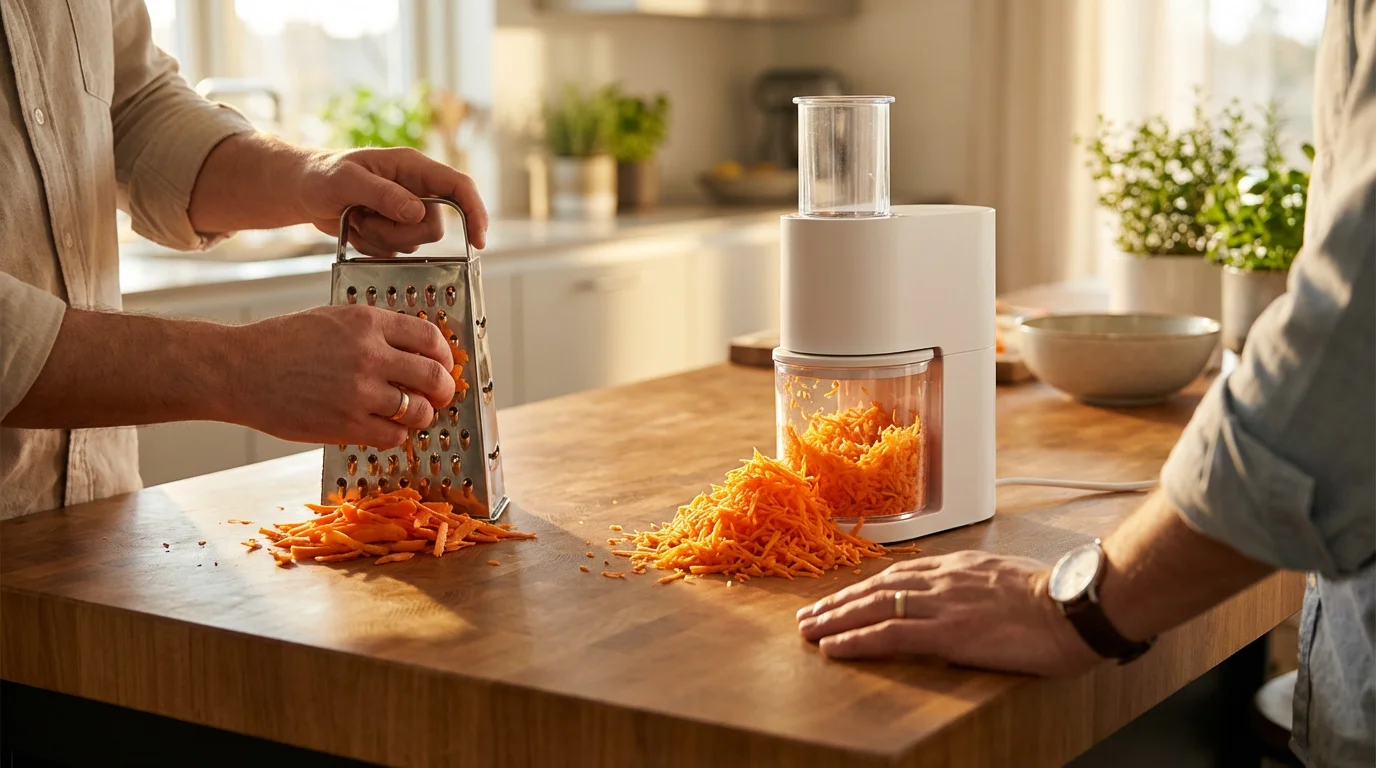
Few kitchen tasks are as universally dreaded as grating cheese or vegetables by hand. It starts well enough, but by the time you reach the bottom of a block of cheddar, your knuckles are dangerously close to the blades, your arm is cramping, and you are wondering if the pre-shredded bag at the store was worth the compromise in flavor. If you take meal prep seriously, investing in an electric grater changes the equation entirely.
An electric grater is a prime example of kitchen gadgets that actually save time during a busy weeknight meal prep.
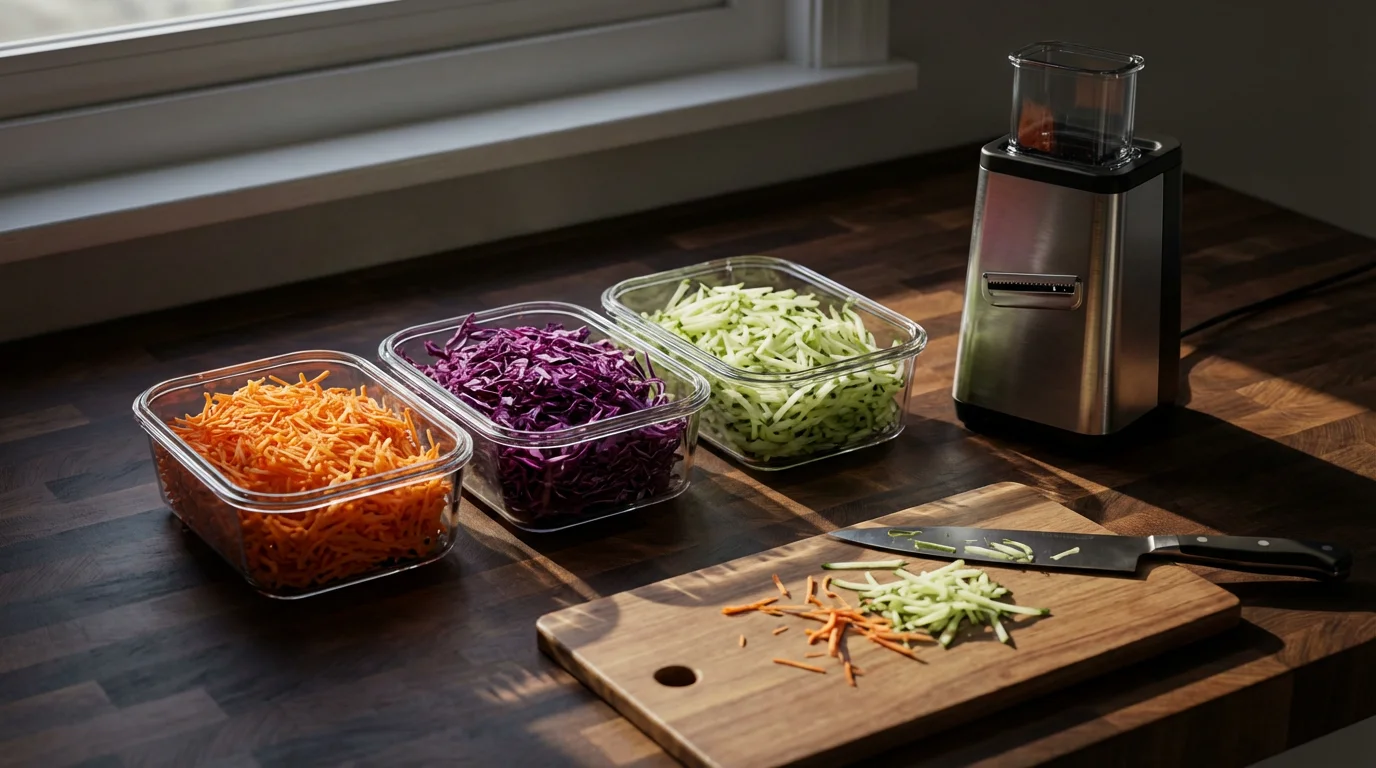
Electric graters and shredders are not just for high-volume restaurants. For the home cook, they represent a significant upgrade in efficiency and safety. Whether you are prepping pounds of potatoes for hash browns, shredding zucchini for bread, or creating mountains of mozzarella for homemade pizza, these tools allow you to achieve perfect mise en place—a French culinary phrase meaning “everything in its place”—without the physical strain.
This guide explores how electric graters work, why fresh ingredients always beat pre-packaged options, and how to choose the right model for your kitchen workflow.
Why Switch to an Electric Grater?
The primary driver for buying an electric grater is speed, but the benefits extend well beyond saving a few minutes. Safety and consistency are equally important factors for anyone who cooks regularly.
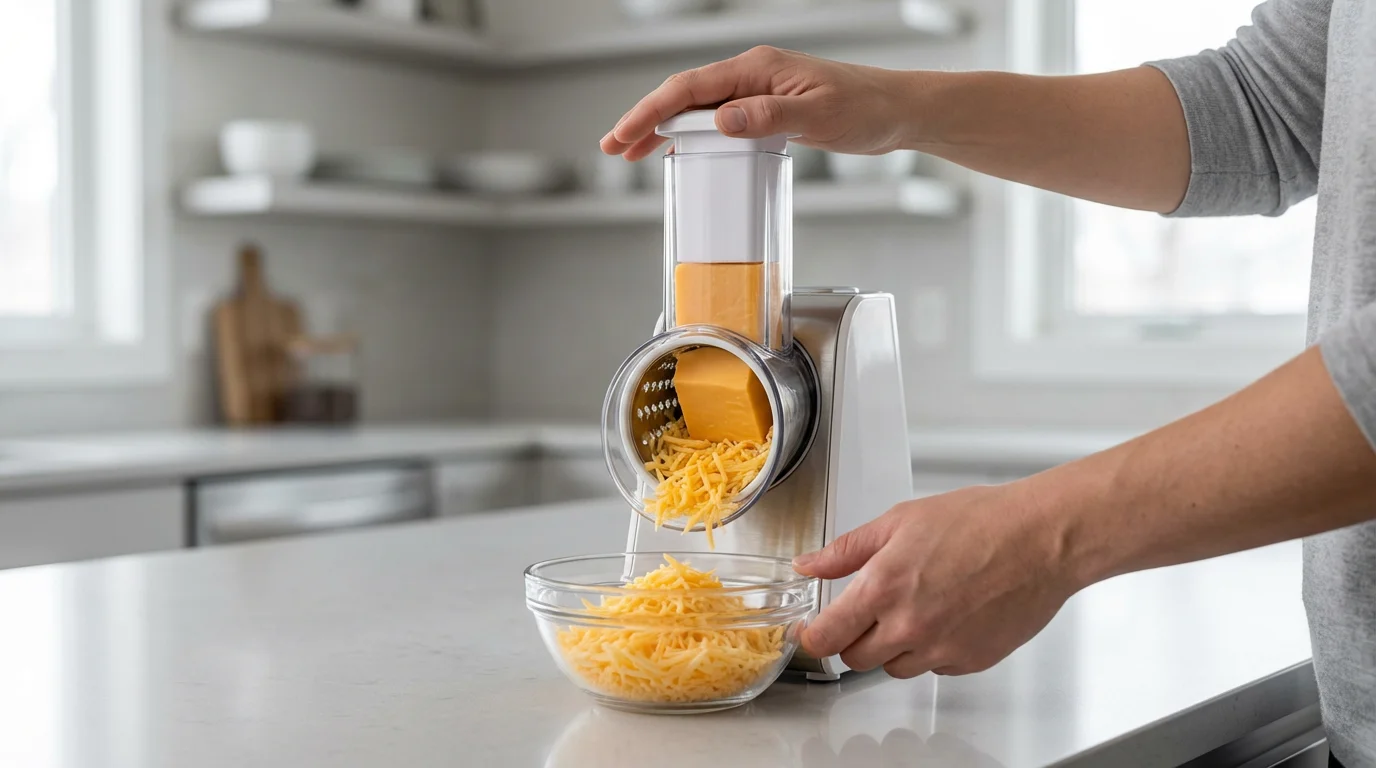
Manual box graters are notorious for causing kitchen injuries. As you fatigue, your grip slips, or you try to grate that last tiny piece of vegetable, leading to accidental cuts. Electric graters eliminate this risk by using a pushing mechanism. Your hands remain safely outside the chute while a plunger guides the food into the spinning blades.
Furthermore, consistency is key to even cooking. When you hand-grate, the size of the shreds often changes as your arm gets tired. An electric motor delivers consistent torque, resulting in uniform shreds. Whether you are making coleslaw or carrot cake, uniform ingredients cook at the same rate, ensuring a better final texture.
Types of Electric Graters
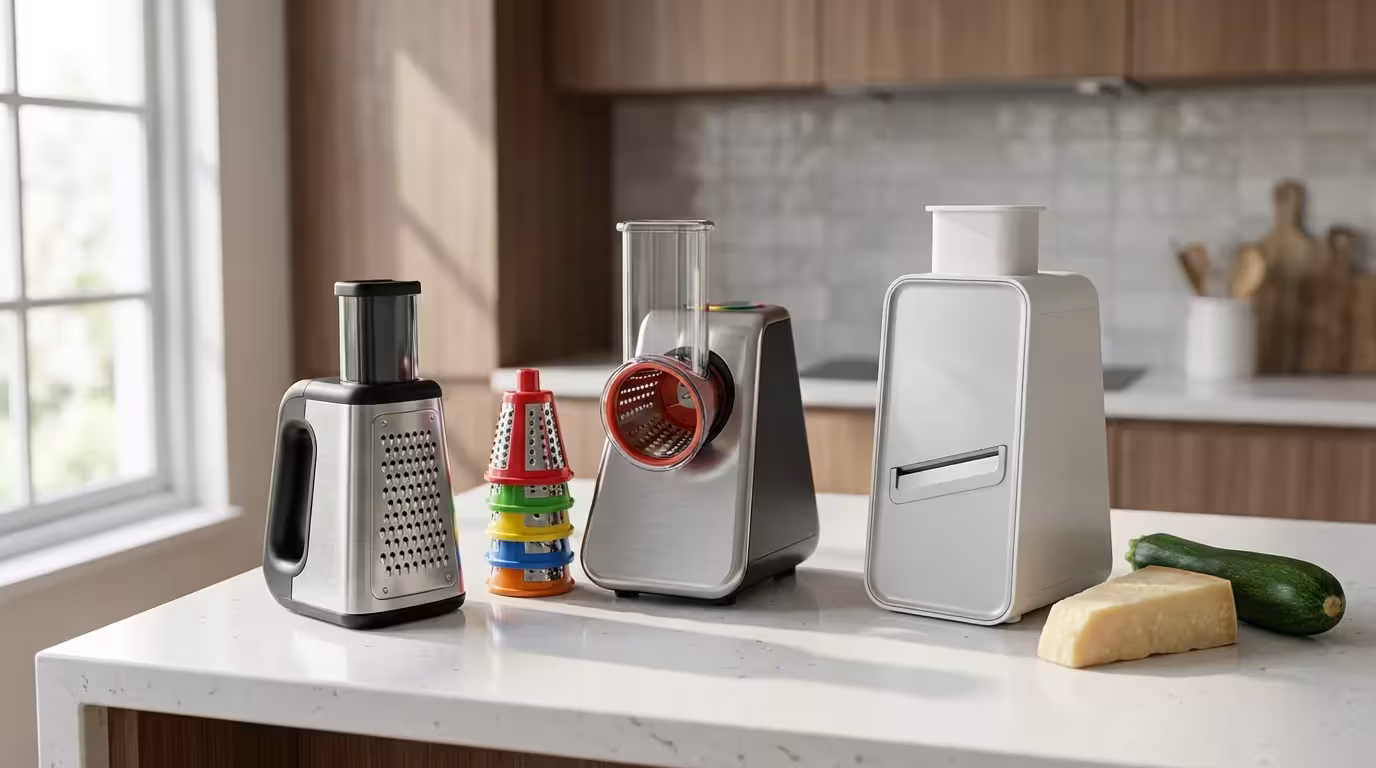
Not all electric graters operate the same way. The market generally offers three distinct styles, each with its own footprint and utility.
1. The “Salad Shooter” Style
These handheld or countertop units shoot the processed food directly out of a spout and into your own bowl or pot. They are typically lightweight and easy to store in a drawer.
- Pros: Unlimited capacity (you are not limited by a work bowl), portable, easy to aim.
- Cons: Can be messy if your aim is off; motors are often less powerful than food processors.
2. Rotary Drum Graters
These look like meat grinders. You insert a cylindrical blade drum into the housing, and the machine spins it while you push food down from the top. These are excellent for hard cheeses and nuts.
- Pros: Very safe design; efficient for harder ingredients.
- Cons: Changing drums can be fiddly; plastic parts may wear out under heavy load.
3. Food Processors with Shredding Discs
While not a “dedicated” electric grater, a food processor is the gold standard for high-volume shredding. Serious Eats notes that for most home cooks, a good food processor is often the most versatile tool for this job because it handles other tasks like chopping and pureeing. You simply swap the chopping blade for a shredding disc.
- Pros: High-torque motors; multipurpose; handles large volumes easily.
- Cons: Bulky; requires more cleanup; usually more expensive.
The Flavor Factor: Fresh vs. Pre-Packaged
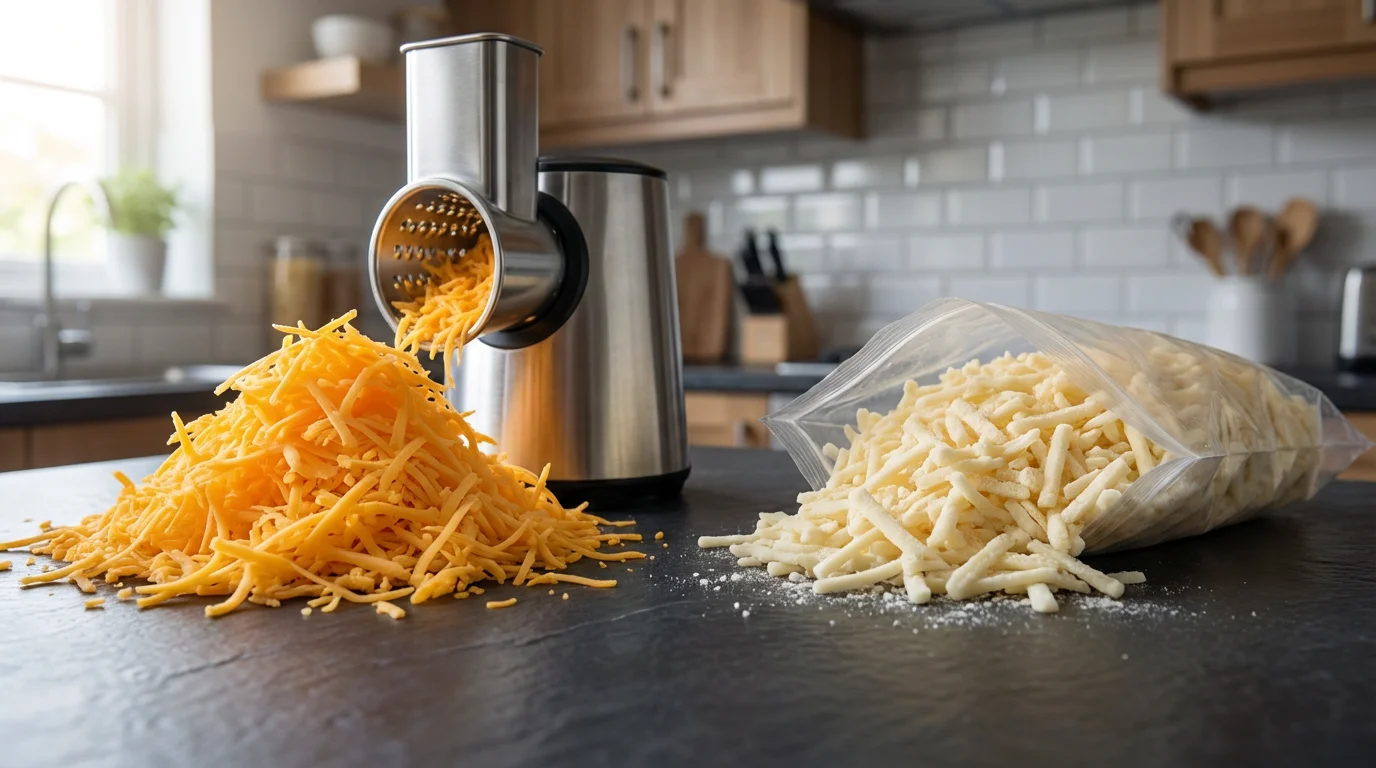
You might wonder why you should buy a machine when you can buy bags of shredded cheese or coleslaw mix at the grocery store. The answer lies in chemistry and texture.
Pre-packaged shredded cheese is coated in anti-caking agents, such as potato starch, cornstarch, or cellulose. While these prevent the cheese from clumping in the bag, they also prevent the cheese from melting properly. If you have ever made a cheese sauce that turned out grainy or a pizza where the cheese didn’t fuse together, the anti-caking agents were likely the culprit.
According to Wirecutter, freshly grated cheese melts smoother and tastes more vibrant because it hasn’t been sitting in plastic for weeks. By using an electric grater, you get the convenience of “fast food” with the quality of scratch cooking.
Key Features to Look For
When shopping for an electric grater, ignore the flashy colors and focus on the specifications that affect performance.
Motor Power (Wattage)
If you plan to grate hard cheeses like Parmesan or dense vegetables like sweet potatoes, you need torque. Low-wattage motors (under 150 watts) may stall or overheat when facing resistance. Look for a robust motor, or utilize the “pulse function”—short bursts of power that prevent the blade from jamming.
Chute Size
The “feed tube” or chute dictates how much prep work you need to do before you start grating. A narrow chute means you have to cut your block of cheese or potato into small strips to fit them in. A “wide mouth” chute can accept larger chunks, significantly speeding up the process.
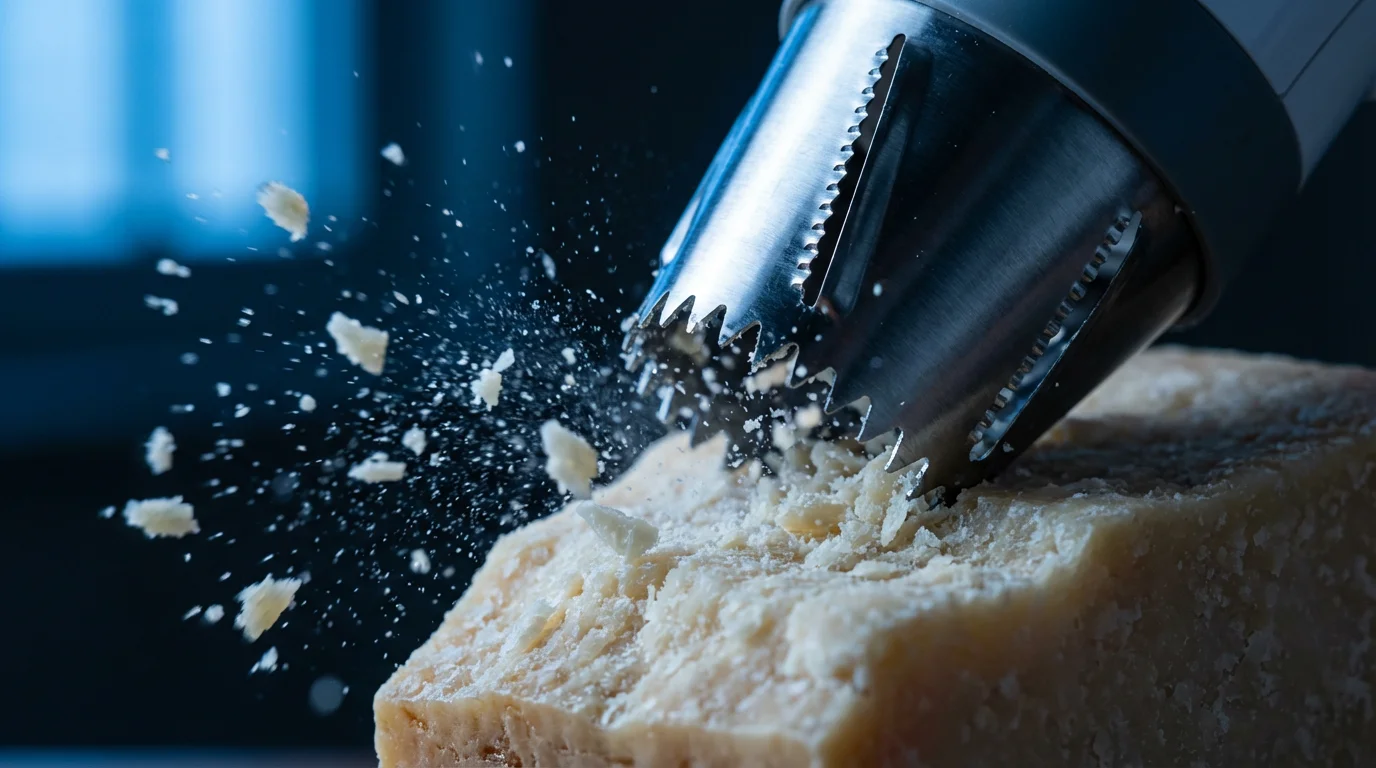
Blade Material and Variety
Ensure the grating drums or discs are made of stainless steel. Plastic parts in the cutting zone are prone to breaking. Ideally, your unit should come with at least three options:
- Fine Grate: For Parmesan, chocolate, and breadcrumbs.
- Coarse Grate: For cheddar, mozzarella, and hash browns.
- Slicing Blade: For cucumbers, carrots, and pepperoni (creating a mandoline effect).
Note: A mandoline is a flat tool used for slicing, but many electric graters include a slicing insert that mimics this function safely.
Best Uses for Electric Graters
Once you have the tool on your counter, you will find it useful for more than just Taco Tuesday. Here are practical ways to utilize your electric grater.
For those looking for even more creative ways to process produce, checking out the ultimate guide to vegetable spiralizers can help expand your vegetable prep techniques.
1. Bulk Meal Prep
If you prep salads for the week, you can shred carrots, red cabbage, and cucumbers in under two minutes. Store them in airtight containers with a paper towel to absorb moisture, and you have instant salad toppings for days.
2. Baking Essentials
Grating cold butter for biscuits or pie crusts is a secret pro technique. An electric grater creates uniform ribbons of cold butter that distribute evenly into the flour, creating flaky layers without melting the fat.
3. The “Soft Cheese” Trick
Grating soft cheeses like Mozzarella or Fontina can be difficult because they tend to mush rather than shred. Pro Tip: Place your soft cheese in the freezer for 15 to 20 minutes before grating. The cheese firms up enough to shred cleanly without clogging the machine.
Comparison: Manual vs. Electric
Is the electric upgrade right for you? This comparison highlights the trade-offs.
If your goal is a silky texture for mashed potatoes rather than shreds, using a food mill will yield much better results than an electric grater.
The choice between manual and power-operated equipment is common, much like the debate surrounding manual vs electric citrus juicers for the home bar or kitchen.
| Feature | Manual Box Grater | Electric Grater |
|---|---|---|
| Speed | Slow; depends on arm strength | Fast; processes pounds in minutes |
| Safety | High risk of scraped knuckles | Very Safe (fingers away from blades) |
| Setup/Cleanup | Instant setup; easy wash | Requires assembly; more parts to wash |
| Storage | Compact; fits in deep drawer | Requires counter or cabinet space |
| Best For | Small garnishes (lemon zest, parmesan over pasta) | Bulk prep, family meals, hard vegetables |

Safety and Maintenance Tips
While safer than manual graters, electric models still feature sharp moving parts. Following proper safety protocols ensures longevity for both your fingers and the machine.
The Pusher is Your Best Friend
Never, under any circumstances, use your fingers to push food down the chute. Even if the blade looks far away, a slip can be disastrous. Always use the plastic tamper or pusher provided with the machine. If a piece of food gets stuck, unplug the unit before attempting to dislodge it.
Cleaning and Care
Cheese leaves a greasy residue that can harden like cement if left to dry. Clean your grater components immediately after use. Most removable parts (blades, chutes, pushers) are top-rack dishwasher safe, but always check the manual.
If you wash by hand, use a bottle brush to scrub the grating drums. Sponges tend to get shredded by the sharp holes. Consumer Reports suggests drying metal blades immediately to prevent rust spots, even if they are stainless steel.
Blade Maintenance
Unlike knives, grating drums are difficult to sharpen. “Honing” (realigning the edge) isn’t really an option here. If you notice your machine is mashing food rather than cutting it, the blades have likely dulled. For most electric graters, the solution is replacing the blade attachment rather than attempting to sharpen it.
Frequently Asked Questions
Can I grate chocolate with an electric grater?
Yes, but temperature is crucial. Chocolate melts at body temperature and friction generates heat. Refrigerate the chocolate beforehand. Use a pulsing technique to prevent the heat from the motor and friction from melting the chocolate into a messy lump.
Can an electric grater replace a food processor?
It depends on your needs. If you only use a food processor for shredding cheese and slicing veggies, then yes, a dedicated electric grater/slicer is a smaller, often cheaper alternative. However, it cannot chop nuts into butter, make dough, or puree soups like a full-sized food processor.
Is it safe to put the parts in the dishwasher?
Generally, the removable plastic parts and stainless steel drums are dishwasher safe on the top rack. However, the high heat of some dishwasher drying cycles can warp plastic chutes over time. For the longest lifespan, hand washing with a brush is recommended.
Can I use it for zesting lemons or limes?
Usually, no. Electric graters are too aggressive for delicate zesting. They tend to take the bitter white pith along with the zest. For citrus, a manual handheld rasp-style grater (like a Microplane) remains the superior tool.
Disclaimer: Product prices and availability change frequently. Prices shown were accurate at time of writing but may have changed. We may earn a small commission from purchases made through links on this site, at no extra cost to you. Always use cutting tools carefully and follow manufacturer safety guidelines.


Leave a Reply