You likely have a jar of wooden spoons sitting on your countertop right now. They are the workhorses of the kitchen—gentle on your expensive non-stick pans, sturdy enough to scrape fond (the flavorful browned bits) from the bottom of a Dutch oven, and naturally heat-resistant. Yet, despite their utility, wooden utensils are often the most neglected tools in a home cook’s arsenal.
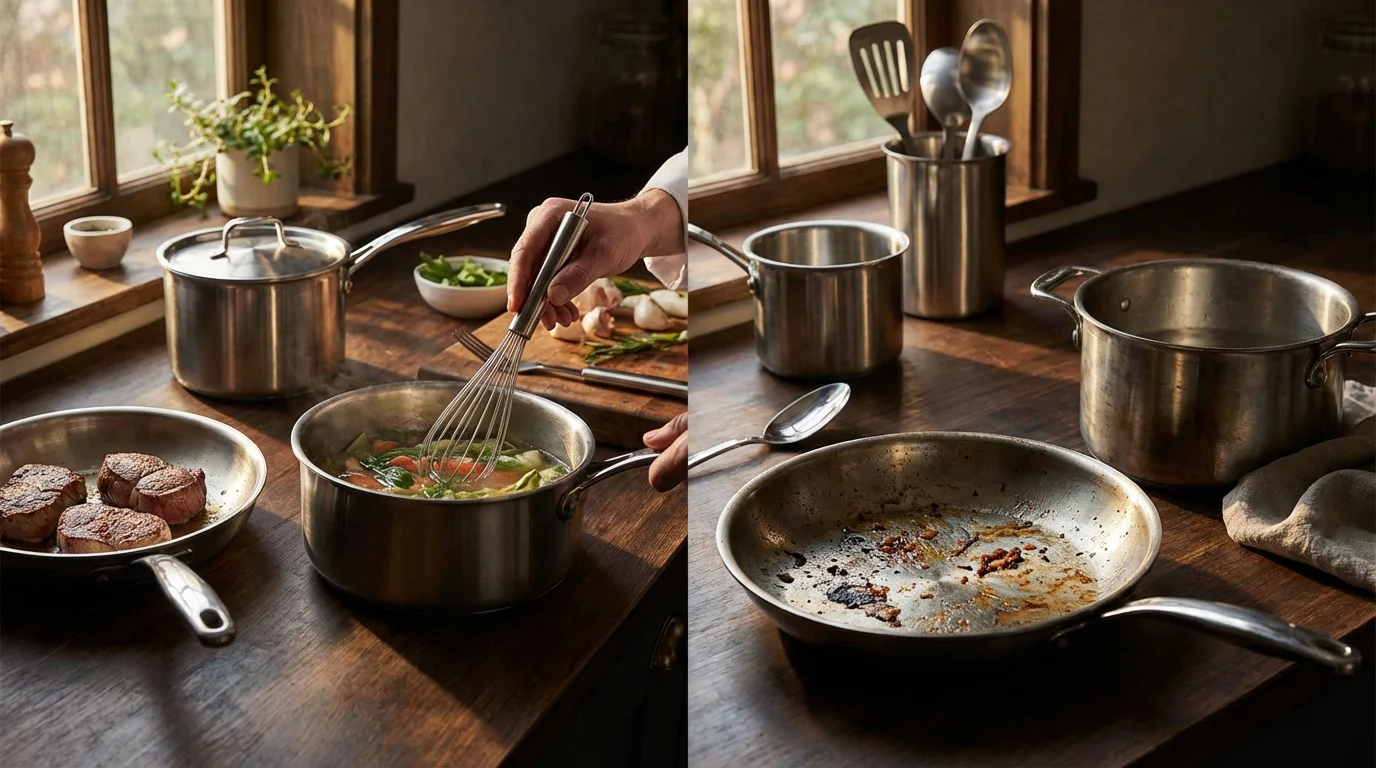
A high-quality wooden spoon is the ideal companion for everyday saucepans, as it won’t scratch the bottom while you stir.
Unlike stainless steel or silicone, wood is a biological material. It reacts to its environment. It expands when wet, contracts when dry, and absorbs odors if not treated properly. When you throw a wooden spoon in the dishwasher or leave it soaking in the sink, you aren’t just cleaning it; you are actively degrading its structure. However, with the right maintenance routine, a simple maple or olive wood spoon can last for decades, eventually becoming smooth, darkened, and perfectly molded to your grip.
This guide covers everything you need to know to keep your wooden kitchen tools sanitary, smooth, and beautiful. We will strip away the myths about cleaning and focus on the science of wood maintenance.
Understanding Wood Grain and Porosity
To care for your utensils, you first need to understand what you are working with. Wood is porous. Even dense hardwoods like maple, cherry, and walnut contain microscopic tubes (xylem) that originally transported water through the tree. When you cook, these pores can absorb liquids, oils, and bacteria.
Properly scraping the pan with wood can also help you learn how to prevent food from sticking when using stainless steel.
Learning how to spot quality kitchen tools made from closed-grain hardwoods is the first step in building a professional-grade collection.
This porosity is why specific maintenance is non-negotiable. If you leave a spoon wet, the wood fibers swell. As they dry, they shrink. Repeated cycles of extreme swelling and shrinking—like what happens in a dishwasher—cause the wood to crack and split. Once a spoon cracks, it becomes a safety hazard, as food particles and bacteria can lodge deep inside the fissure where simple scrubbing cannot reach.
Hardwood vs. Softwood
Most quality kitchen utensils are made from closed-grain hardwoods like sugar maple, olive wood, or beech. These woods are dense and naturally resist absorption better than softwoods like pine (which should never be used for cooking utensils due to resin taste). If you are building your collection, prioritize these dense materials.
The Daily Cleaning Routine
The lifespan of your wooden spoon is determined the moment you finish cooking. The goal is to clean the utensil without waterlogging the core of the wood.
When preparing your mise en place, ensure you are using accurate measuring spoons before you begin stirring.
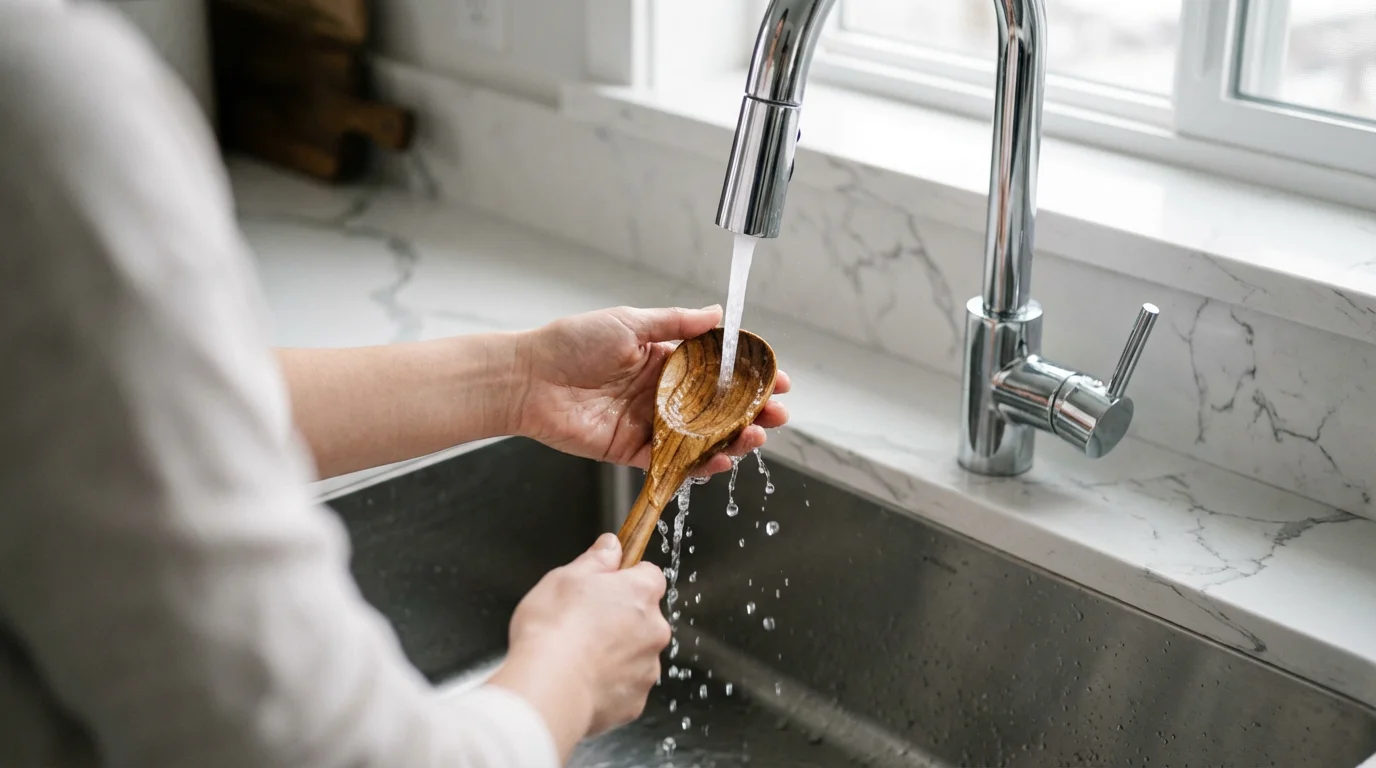
- Wash Immediately: Do not let wooden utensils sit in the pot or the sink. The longer they sit, the more moisture and food odors they absorb.
- Use Hot, Soapy Water: Hand wash with mild dish soap and hot water. Use a sponge or a nylon scrub pad. Avoid steel wool, which can tear up the wood grain and leave metal splinters.
- Rinse Quickly: Rinse off the soap rapidly. Do not submerge the spoon for an extended period.
- Towel Dry Instantly: This is the most critical step. Wipe the spoon dry with a clean dish towel immediately after rinsing. Do not rely solely on air drying, as surface water can seep in before it evaporates.
- Stand Upright to Air Dry: Once towel-dried, place the spoon upright in a crock or utensil holder with good airflow. Ensure they are fully dry before putting them into a drawer to prevent mildew growth.
“The dishwasher is the graveyard of wooden utensils. The combination of high heat, extended water exposure, and harsh detergents strips natural oils and causes warping.” — Professional Woodworker

Deep Cleaning, Sanitizing, and Deodorizing
Even with good daily habits, wooden spoons can occasionally pick up the smell of garlic, onion, or pungent spices. They may also stain if you frequently cook tomato-based sauces or curries with turmeric. Here is how to reset your tools without harsh chemicals.
While keeping them clean is vital, choosing tools that protect the finish of high-end copper cookware is equally important for a long-lasting kitchen setup.
Removing Odors
If your spoon smells like last night’s stir-fry, use the power of acid. Lemon juice or white vinegar works exceptionally well to neutralize organic odors.
- The Lemon Rub: Cut a lemon in half and rub the cut side vigorously over the surface of the spoon. Let it sit for a few minutes, then rinse and dry.
- Vinegar Soak (Brief): For stubborn smells, mix a solution of 1 part white vinegar to 4 parts hot water. Soak the spoon for just two to three minutes—no longer—then wash and dry thoroughly.
Removing Stains
Turmeric and tomato stains can be stubborn. To lift them, create a paste using baking soda and water (or lemon juice for extra bleaching power). Scrub the stained area with this paste using a stiff brush. Rinse and dry. Note that some patina is normal for a well-loved tool; a slightly red-tinted spoon that is clean and oiled is perfectly functional.
Sanitizing
If you are worried about bacteria after cooking with raw meat (though you should generally use stainless steel or silicone for raw meat to be safe), you can sanitize wooden tools with hydrogen peroxide. Pour standard 3% hydrogen peroxide over the spoon. It will fizz as it kills bacteria. Wash and dry immediately after the fizzing stops.
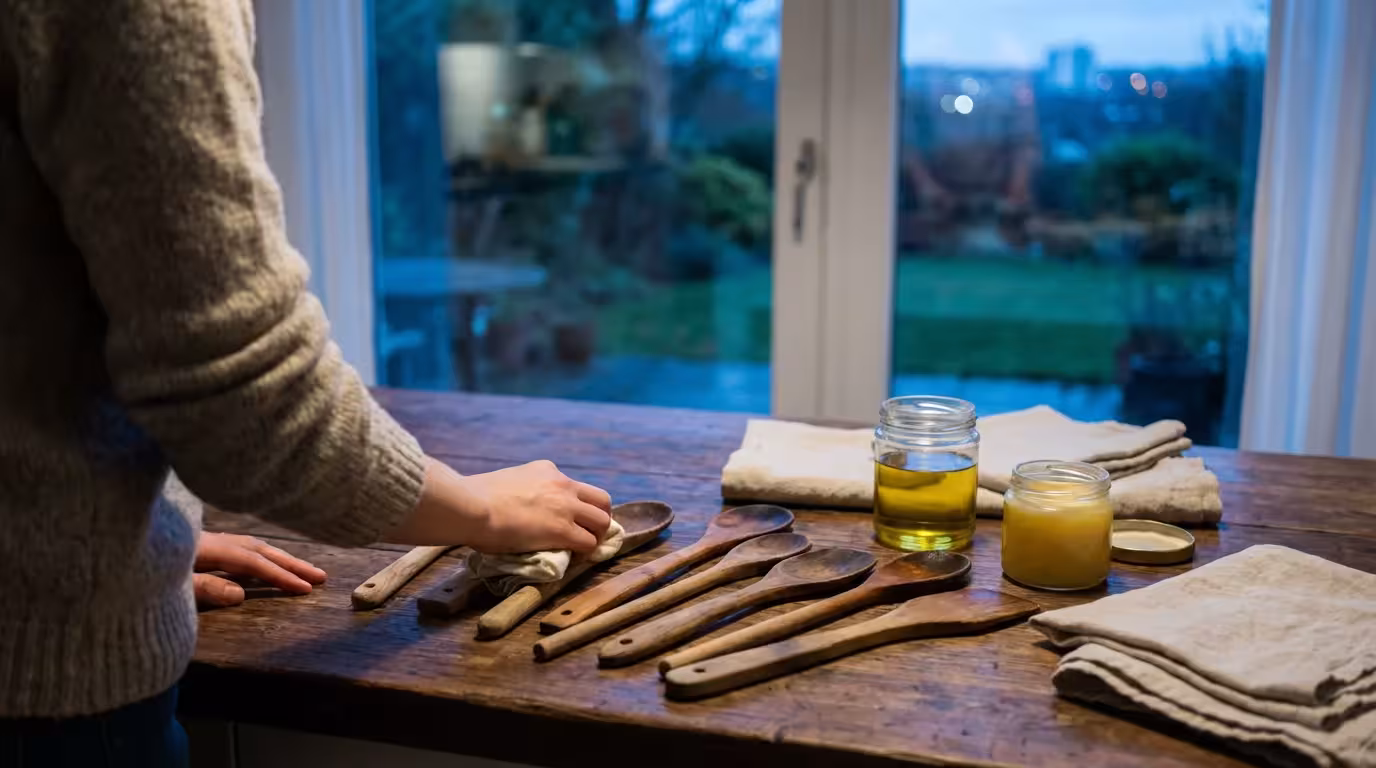
The Art of Oiling and Conditioning
Wood dries out over time. When wood loses its natural moisture, it becomes brittle, rough, and light in color. Oiling, or “conditioning,” replaces this moisture with a protective barrier that repels water and prevents staining.
If you enjoy the tactile nature of maintaining wood, you might also be interested in the care required for carbon steel pans.
This maintenance process is very similar to how you would season a cast iron skillet to create a natural, protective barrier.
What Oil Should You Use?
This is where many home cooks make a fatal mistake. Never use vegetable oil, olive oil, canola oil, or coconut oil to condition your spoons. These are food oils that will eventually go rancid (oxidize), leaving your spoons sticky and smelling like old crayons.
The Best Conditioners:
- Food-Grade Mineral Oil: This is the industry standard. It is petroleum-derived, odorless, tasteless, and does not go rancid. It penetrates deeply to saturate the wood fibers.
- Beeswax and Oil Blends: Often sold as “Spoon Butter” or “Board Cream.” The beeswax creates a surface layer that helps repel water physically, while the oil penetrates the wood.
- Walnut Oil (Processed): Specifically processed walnut oil (cured) is a drying oil that hardens into a polymer within the wood. However, avoid this if you have nut allergies in the house.
According to Serious Eats, maintaining a layer of oil is the single most effective way to extend the life of wooden kitchenware. It prevents the cycle of absorption and drying that leads to cracks.
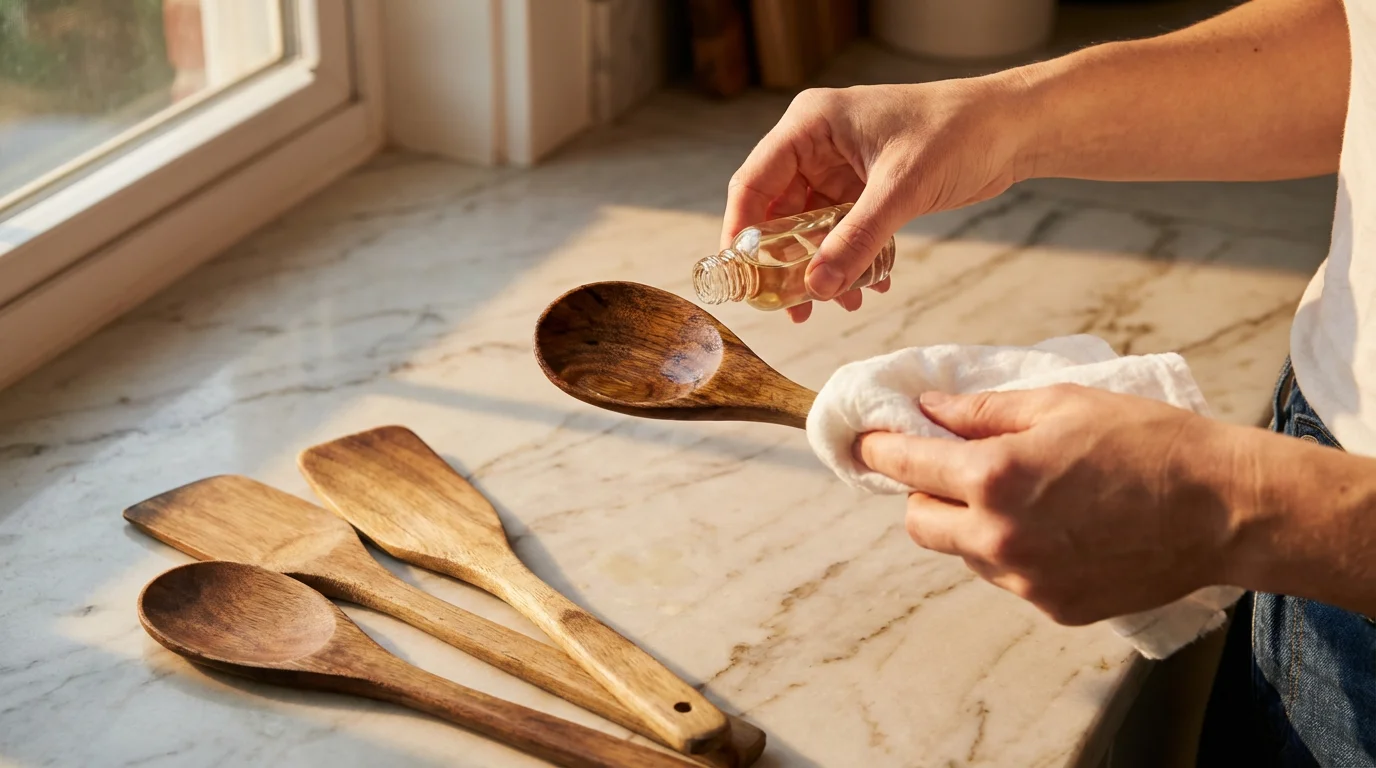
How to Oil Your Spoons
- Ensure the spoon is clean and 100% dry. Ideally, do this in the evening so they can sit overnight.
- Apply a generous amount of mineral oil or spoon butter to a clean cloth or paper towel.
- Rub the oil into the wood, covering the handle and the bowl. The wood will look wet and shiny.
- Let the spoon sit for at least 2 hours, or overnight.
- Wipe off any excess oil that hasn’t been absorbed. The spoon should feel smooth, not greasy.
Repeat this process whenever your spoons look dull or feel “thirsty”—usually once a month for tools you use daily.
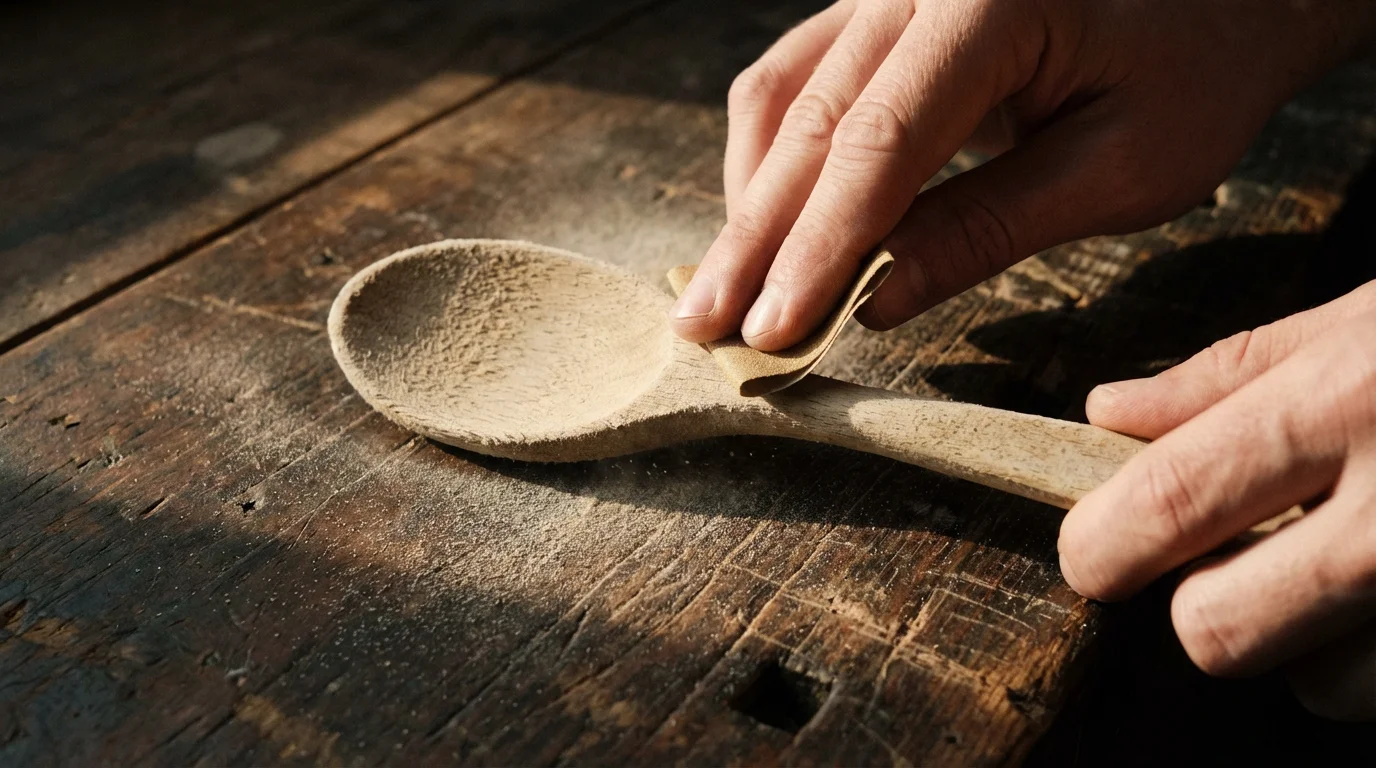
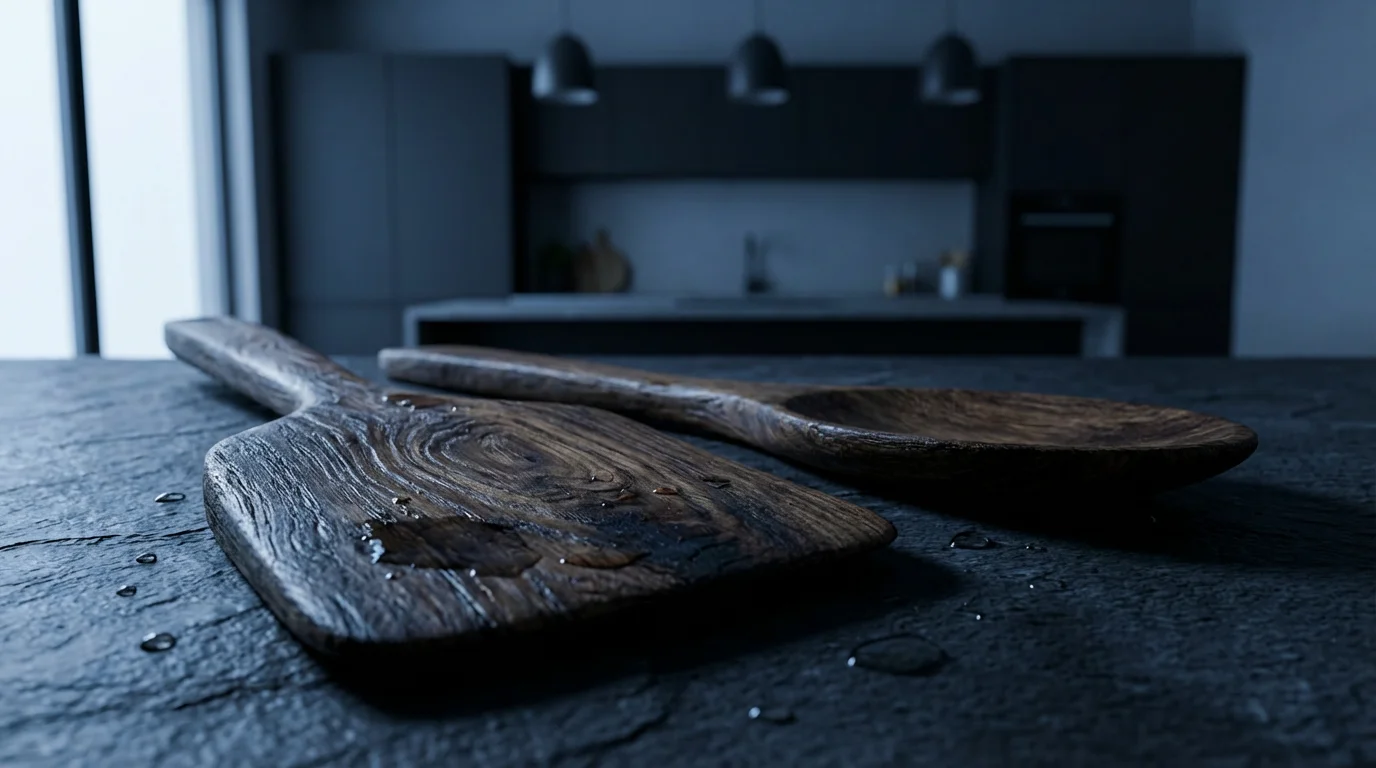
Restoring Rough or Damaged Spoons
Have you ever washed a new wooden spoon and found that it felt “fuzzy” or rough afterward? This is called “raising the grain.” Water causes the cut wood fibers to stand up. This can also happen to old spoons over time.
Just as you would commit to sharpening your kitchen knives, restoring your wood utensils is a necessary skill for any serious home cook.
You do not need to throw a rough spoon away. You can restore it to a glass-like finish with sandpaper.
The Restoration Process
- Clean the Spoon: Ensure it is dry and free of food residue.
- Sand (Low Grit): Start with a coarse grit sandpaper (around 100 or 150 grit). Sand with the grain of the wood until the major rough patches and stains are removed.
- Sand (High Grit): Switch to a finer sandpaper (220 to 400 grit). Sand until the wood feels incredibly smooth to the touch.
- Wash and Dry: Wipe away all wood dust.
- Oil Heavily: Freshly sanded wood is thirsty. Apply a heavy coat of mineral oil to seal the new surface.
This process can also remove shallow burn marks if you accidentally left your spoon resting against a hot pan rim.
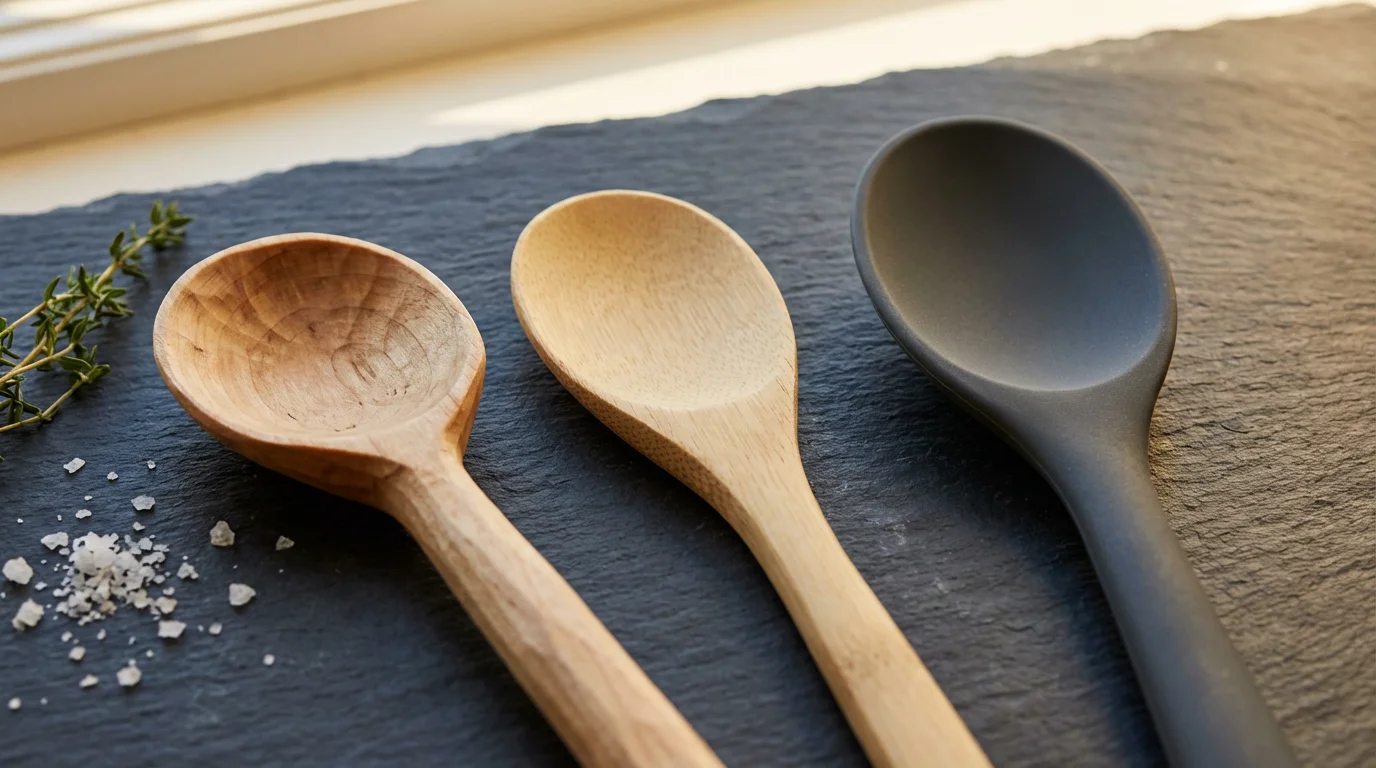
Comparison: Wood vs. Bamboo vs. Silicone
While this guide focuses on wood, it is helpful to understand how it stacks up against other common materials in your crock. Bamboo is often grouped with wood, but it is technically a grass and requires slightly different expectations.
If you find hand-washing too tedious, you might consider if silicone kitchen tools are a better fit for your high-heat cooking needs.
| Feature | Hardwood (Maple/Olive) | Bamboo | Silicone | Stainless Steel |
|---|---|---|---|---|
| Durability | High (decades with care) | Medium (can split/fray) | High (indestructible) | Very High |
| Heat Resistance | Good (won’t melt) | Good | Excellent (up to 450°F+) | Excellent |
| Pan Safety | Safe for Non-stick/Enamel | Safe for Non-stick/Enamel | Safe for Non-stick/Enamel | Avoid on Non-stick |
| Maintenance | High (Hand wash & oil) | Medium (Hand wash) | Low (Dishwasher safe) | Low (Dishwasher safe) |
| Best Use | Scraping fond, thick stews, baking | Stir-frying, light mixing | Scraping bowls, viscous sauces | Thin liquids, flipping meat |
Bamboo utensils are harder and more fibrous than wood. They are inexpensive and sustainable, but they tend to fray at the ends more easily. Because bamboo is constructed from strips of grass glued together, you must be vigilant about checking for splitting, as the glues can fail over time.
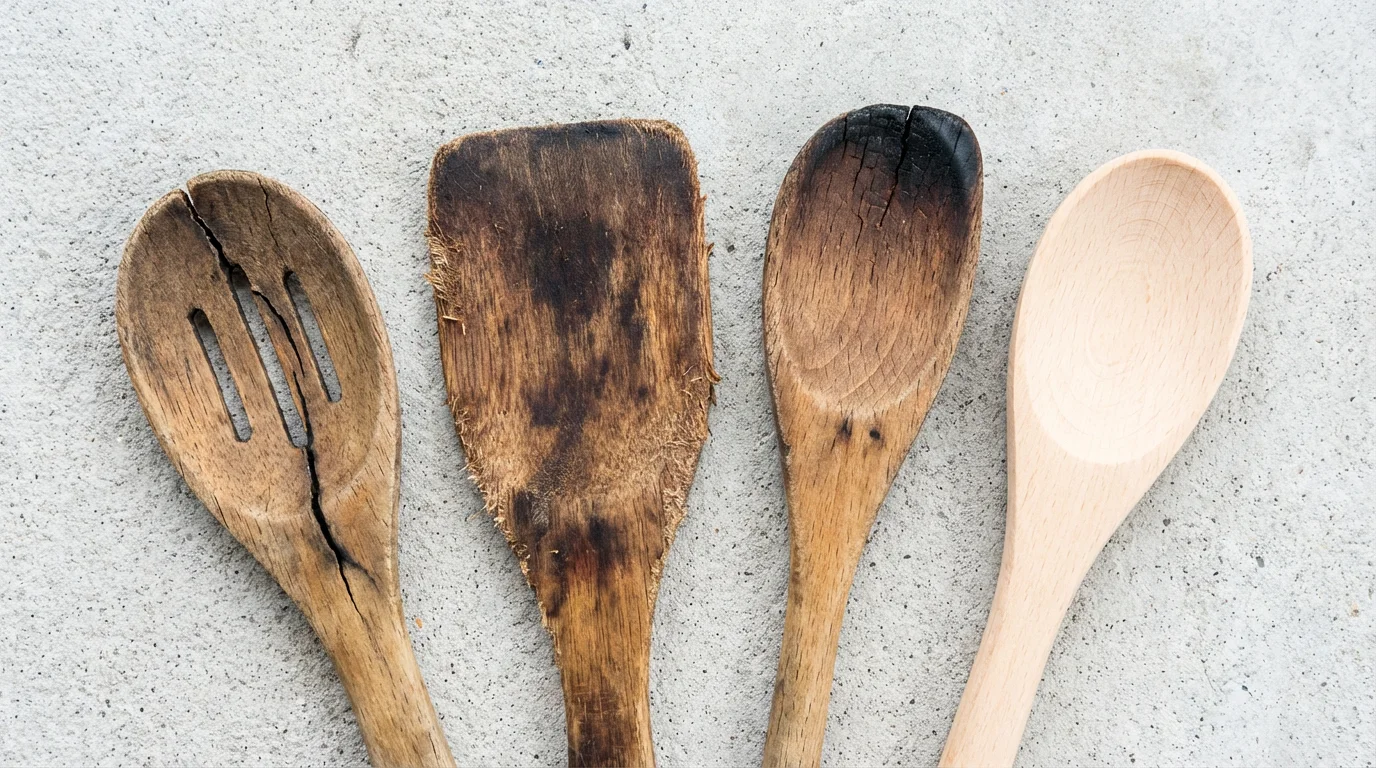
When to Retire Your Wooden Tools
Despite your best efforts, wooden utensils eventually reach the end of their lifecycle. Holding onto a damaged spoon isn’t frugal; it is a hygiene risk.
Investing in high-quality, versatile tools like these helps you avoid filling your kitchen with gadgets you don’t need.
Replace your utensil if:
- It has deep cracks: If a crack is large enough to catch your fingernail, it is large enough to harbor colonies of bacteria and mold. No amount of cleaning can sanitize a deep fissure in wood.
- It has turned black: If the wood (especially near the handle or the neck of the spoon) turns soft and black, this indicates rot. The cellular structure has broken down due to moisture.
- It is splintering: If the edge of the spoon is fraying and sanding doesn’t fix it, you risk getting wood splinters in your food.
Brands like Le Creuset and All-Clad offer high-end wooden tools, but even budget-friendly options from restaurant supply stores can last for years if you follow the maintenance steps outlined above. As Wirecutter suggests in their kitchen organization guides, keeping your tool set curated and in good condition makes cooking significantly more enjoyable.
Frequently Asked Questions
Can I put my wooden spoons in the dishwasher?
No. The dishwasher is the fastest way to ruin wooden utensils. The high heat of the drying cycle and the prolonged exposure to water and harsh detergents strip the natural oils from the wood. This causes the fibers to swell and contract violently, leading to warping, cracking, and eventual breakage.
What should I do if my wooden spoon feels sticky?
If your spoon feels sticky, it likely has a buildup of polymerized vegetable oil (if you oiled it with cooking oil) or residue from food fats. To fix this, scrub the spoon vigorously with a paste of baking soda and water to strip the surface. Rinse, dry thoroughly, and then re-condition it with proper food-grade mineral oil.
Is it safe to use wooden spoons with raw meat?
While wood is naturally antimicrobial to a degree (it pulls bacteria into the pores where they die from dehydration), it is generally safer to use non-porous materials like stainless steel or silicone for handling raw meat. If you do use wood, sanitize it immediately afterward with hydrogen peroxide or a diluted vinegar solution, and wash with hot soapy water.
How often should I oil my wooden utensils?
This depends on frequency of use and your climate. In dry climates or winter months, you may need to oil them once a month. In more humid environments, every two to three months may suffice. The visual test is best: if the wood looks chalky, light in color, or dull, it needs oil.
Disclaimer: Product prices and availability change frequently. Prices shown were accurate at time of writing but may have changed. We may earn a small commission from purchases made through links on this site, at no extra cost to you. Always verify current pricing on the retailer’s website before purchasing.

Leave a Reply