You have mixed the perfect dough. You used high-quality vanilla, chilled the butter, and weighed your flour. But when the timer goes off and you pull the baking sheet from the oven, you see a jagged landscape of uneven treats. Some are burnt crisps; others are raw mounds. The culprit isn’t your oven or your recipe—it’s your portioning method.
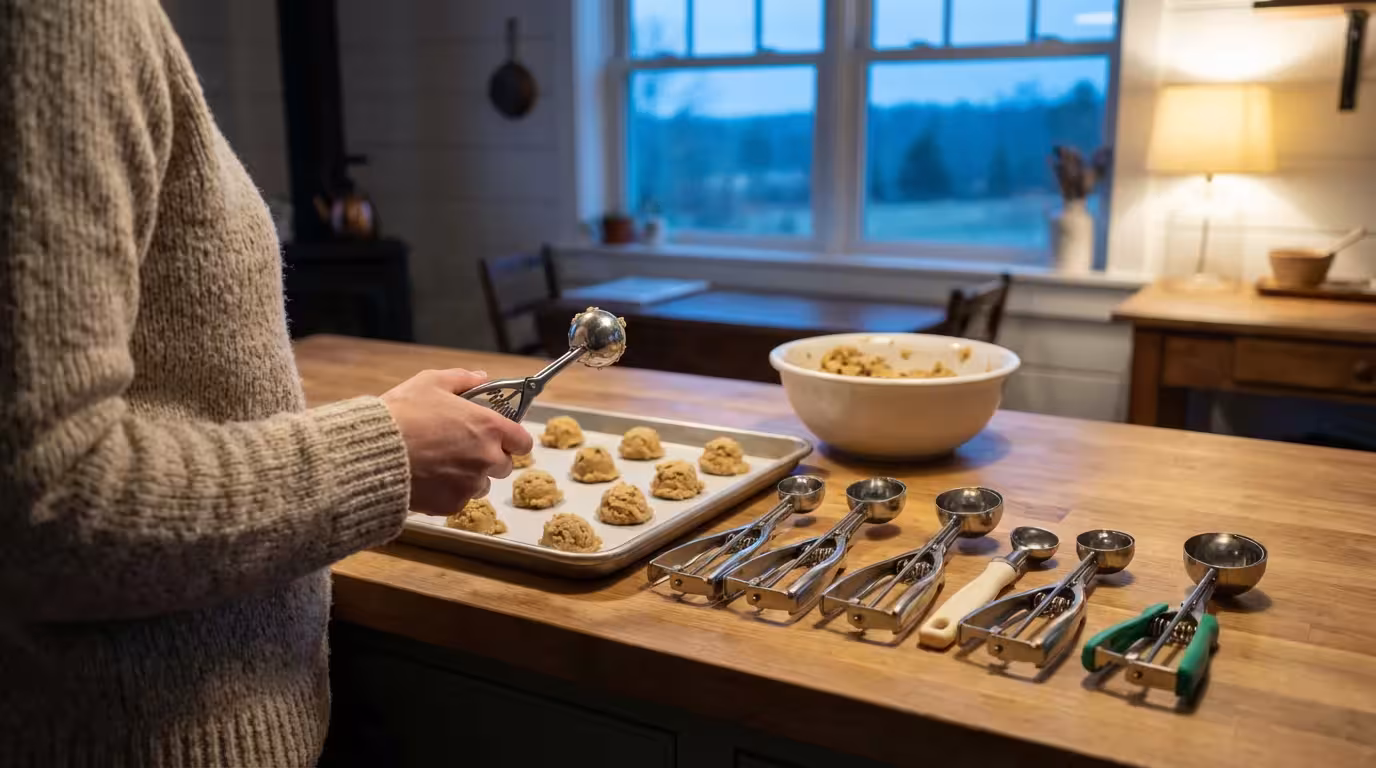
For years, home cooks relied on the “two-spoon method,” a messy affair involving sticky fingers and guesswork. While this works for casual baking, it fails if you want bakery-style consistency. Enter the cookie scoop. Often dismissed as a non-essential luxury, this tool is actually one of the hardest working items in a baker’s drawer. It guarantees that every cookie bakes at the same rate, finishes at the same time, and looks identical on the serving platter.
However, buying a scoop isn’t as straightforward as grabbing the first one you see. They come in a dizzying array of numbers, handle styles, and build qualities. A #40 is not the same as a #60, and a squeeze handle feels very different from a thumb press. This guide breaks down exactly what those numbers mean, which mechanisms save your wrists, and how to choose a tool that won’t fall apart after one batch of oatmeal raisin.
The Science of Consistency
Before diving into the hardware, you must understand why a scoop changes your baking outcomes. It is not just about aesthetics. Uniformity is a matter of thermodynamics.
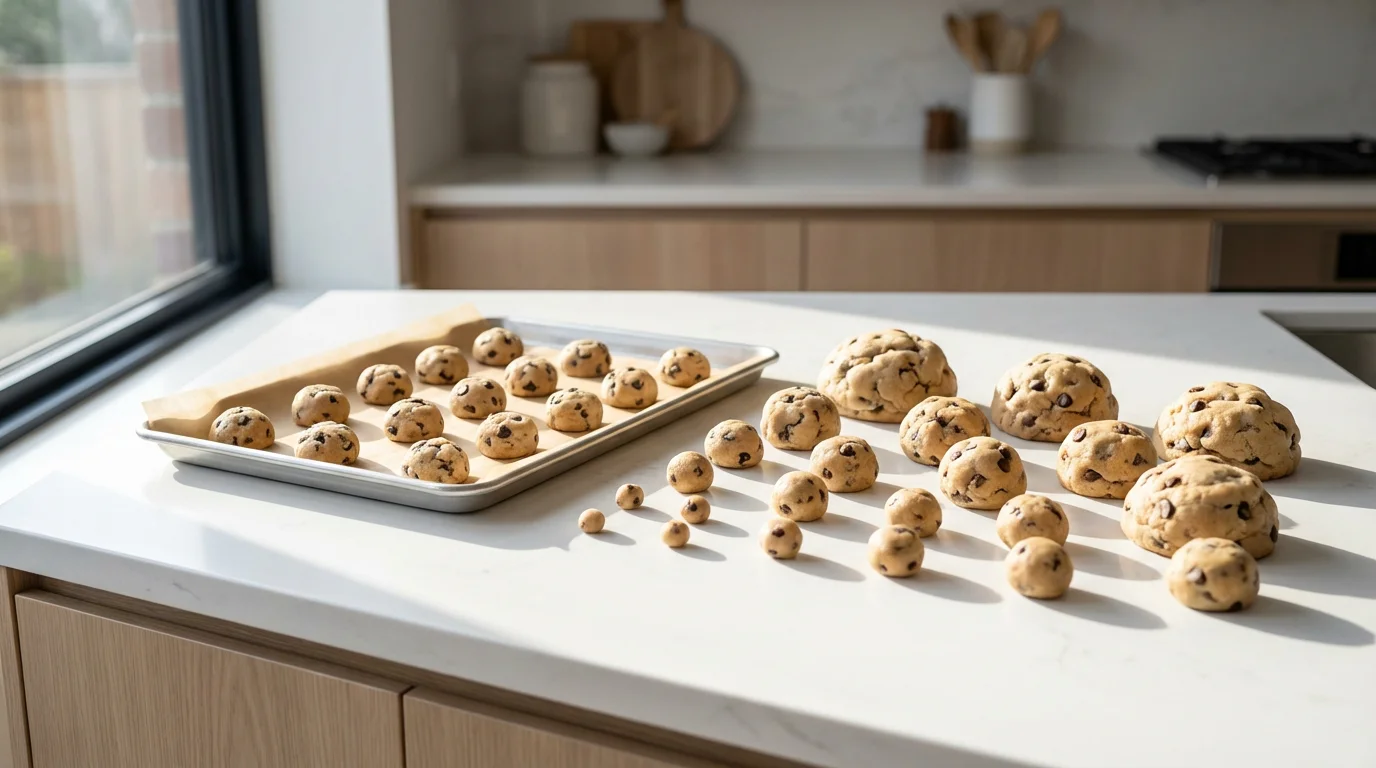
When you place dough balls of varying sizes on a single baking sheet, the heat affects them differently. A tablespoon-sized mound might need 10 minutes to set, while a teaspoon-sized dollop on the same tray will burn in eight. If you pull the tray early to save the small ones, the large ones remain undercooked in the center. A mechanical scoop levels the playing field.
Furthermore, the shape matters. A scoop creates a rounded dome. As the fat melts and the cookie spreads, it does so radially and evenly. A jagged spoonful of dough spreads unpredictably, often leading to thin, crispy edges that shatter when you try to move them.
“The best kitchen gadget is one you’ll actually use every week—not the one with the most Amazon reviews.” — Home Cook
Using a scoop also speeds up the process significantly. You can portion a tray of 12 cookies in under a minute with a good scoop, whereas the spoon method requires constant pausing to scrape dough off your silverware.

Decoding Scoop Sizes: The Number System
If you have ever shopped for scoops, you have likely seen numbers stamped on the wiper or the handle: #20, #40, #60. These are not arbitrary manufacturing codes. They are part of a standardized measurement system used in the food service industry.
The number refers to how many scoops fit into one quart (32 fluid ounces). Therefore, the higher the number, the smaller the scoop. A #10 scoop is huge (you would get 10 scoops per quart), while a #100 is tiny (100 scoops per quart).
For the home baker, this counter-intuitive system can be confusing. To simplify your shopping, here is a breakdown of the most common sizes and their real-world applications.
Cookie Scoop Conversion Chart
| Scoop Number | Volume (Tablespoons) | Dough Ball Diameter | Ideal For |
|---|---|---|---|
| #60 (Small) | 1 Tbsp | 1.5 inches | Tea cookies, small truffles, mini meatballs |
| #50 | 1.25 Tbsp | 1.75 inches | Standard crunchy cookies, gingersnaps |
| #40 (Medium) | 1.5 – 2 Tbsp | 2 inches | The Standard Cookie. Most recipes yield this size. |
| #24 | 2.5 – 3 Tbsp | 2.5 inches | Large bakery-style cookies, cupcakes |
| #20 (Large) | 3 – 3.5 Tbsp | 3 inches | Giant cookies, standard muffin tins, serving mashed potatoes |
Which Size Should You Start With?
If you only buy one scoop, make it a #40 (Medium). This holds roughly 1.5 to 2 tablespoons of dough. When baked, this yields a cookie that is about 3 inches in diameter—the classic size for chocolate chip, oatmeal, or sugar cookies. According to Serious Eats, having a reliable medium scoop is essential for replicating recipe results accurately, as most developers write recipes with this yield in mind.
If you prefer dainty, bite-sized cookies for holiday platters, the #60 is your best bet. Conversely, if you want to recreate the massive, soft-centered cookies sold at coffee shops, you will need a #20 or even a #16.

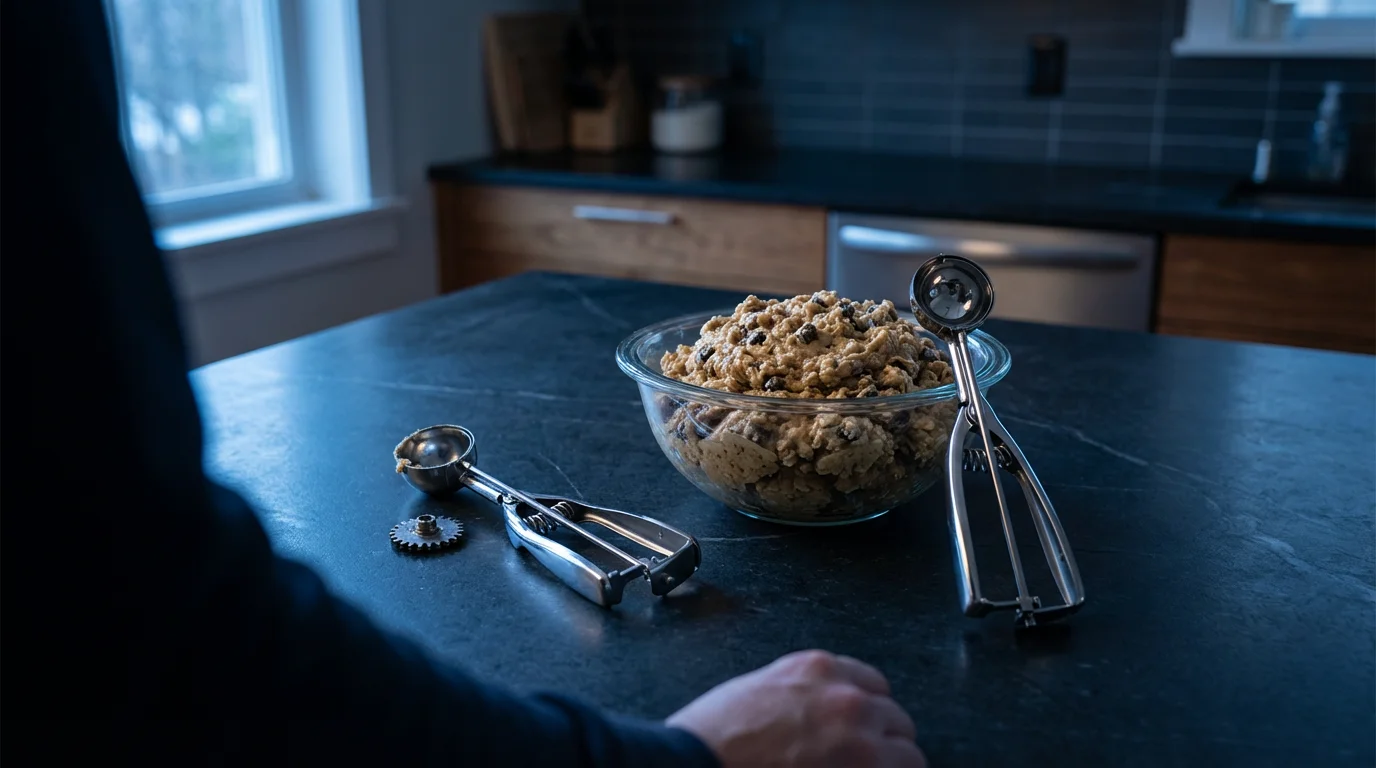
Handle Mechanisms: Squeeze vs. Thumb
The mechanism is the engine of the scoop. It drives the wiper blade (the metal strip inside the bowl) to eject the dough. There are two primary designs, and the choice largely depends on your hand strength and ergonomics.
1. Squeeze Handles (The Plier Grip)
These resemble a pair of pliers or spring-loaded scissors. You hold the handle with your whole hand and squeeze to activate the wiper.
- Pros: Generally more ergonomic for large batches. The motion uses your entire hand rather than just one digit, reducing fatigue. Many modern versions have rubberized, non-slip grips (like those from OXO) that absorb pressure.
- Cons: They have more moving parts. If built cheaply, the internal springs can pop out or the gears can strip. They also take up more drawer space due to the wide handle stance.
2. Thumb Press (The Side Lever)
This is the classic cafeteria-style scoop. A small lever sticks out of the side of the handle, and you depress it with your thumb to sweep the bowl.
- Pros: Very durable. These are often made of all-metal construction with fewer hidden springs to break. They are compact and fit easily in a utensil jar.
- Cons: Thumb fatigue is real. If you are scooping 100 cookies for a bake sale, your thumb will get sore. Additionally, these are usually designed for right-handed users. Left-handed bakers often find the lever awkward to operate.
3. The Ratchet System
Some newer squeeze models use a ratcheting gear system at the base of the scoop bowl rather than a simple spring in the handle. These tend to offer the smoothest action and require the least amount of force, making them excellent choices for bakers with arthritis or limited grip strength.
Material Quality and Durability
Nothing is more frustrating than a cookie scoop that falls apart in the middle of a batch of thick dough. The market is flooded with cheap scoops that look shiny but fail under pressure. Here is what you need to scrutinize.
Stainless Steel vs. Zinc Alloy
Look for 18/8 stainless steel. This indicates 18% chromium and 8% nickel, a composition that resists rust and corrosion. Stainless steel is food safe, dishwasher friendly, and strong. Cheaper scoops are often made of chrome-plated zinc alloy. While they look fine initially, the plating eventually pits and flakes off, especially if run through the dishwasher.
The Gear Construction
Inspect the gears connecting the handle to the wiper. On high-end commercial scoops, these gears are thick metal. On budget models, you might find thin metal tabs or, worse, plastic internal components. Plastic will inevitably strip when faced with chilled, dense cookie dough. Once the gears strip, the wiper stops moving, and the tool becomes a glorified spoon.
The Wiper Blade
The wiper should fit flush against the interior of the bowl. If there is a large gap, dough gets left behind, defeating the purpose of the scoop. A precise fit ensures a clean release every time.
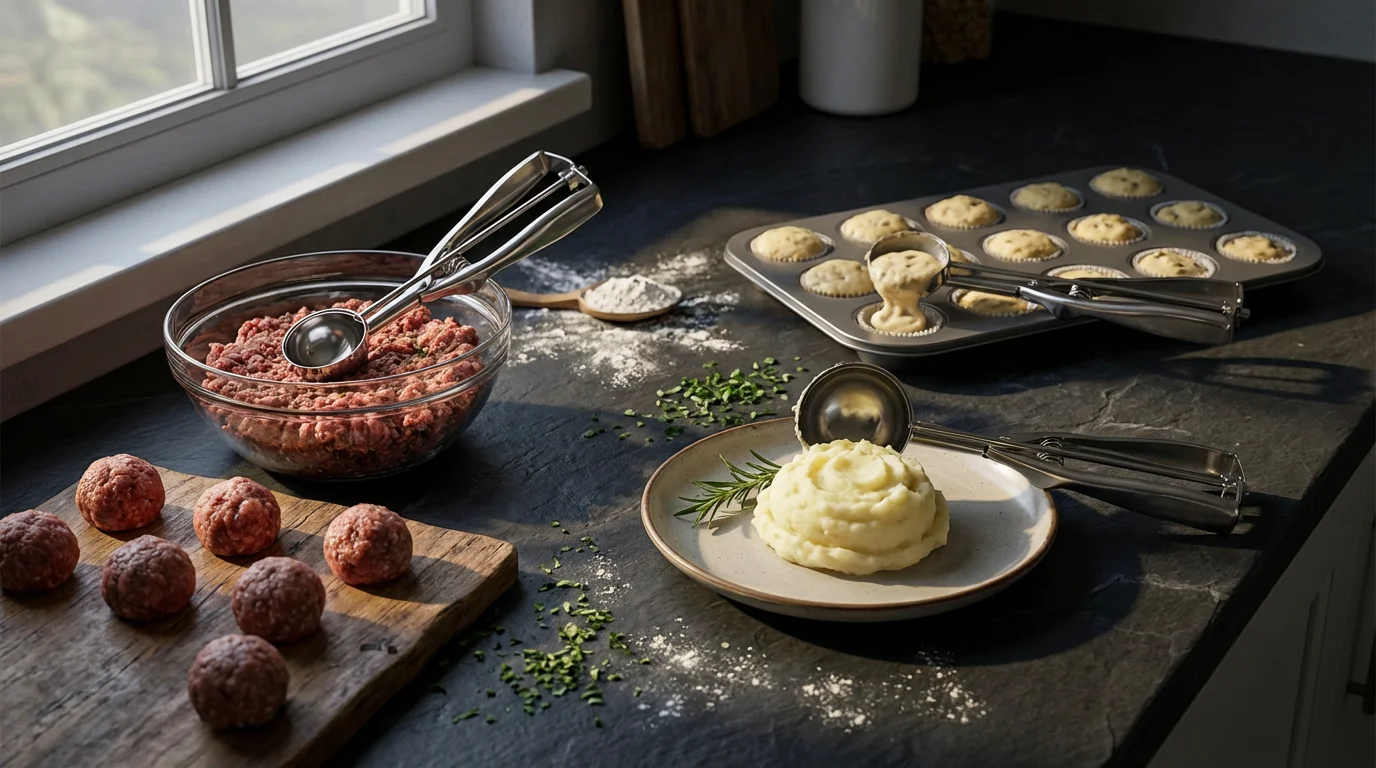
Versatility: More Than Just Cookies
One of the main arguments against buying kitchen gadgets is the “unitasker” problem—tools that do only one thing and clutter your drawers. However, a good set of scoops is far from a unitasker. Experts at Wirecutter often highlight how versatility adds value to kitchen tools, and scoops are a prime example. Here is how to utilize them for savory cooking and other baking projects.
- Muffins and Cupcakes: A #20 or #24 scoop is perfect for standard muffin tins. It deposits the batter cleanly into the liner without the drips caused by pouring from a bowl.
- Meatballs: Using your hands to roll meatballs heats the fat, which can make the meat tough. A scoop (size #40 or #50) keeps the meat cold and ensures every meatball cooks at the same speed.
- Pancakes: A large scoop helps you drop perfectly round batter circles onto a hot griddle.
- Truffles and Confections: A #60 or smaller scoop is ideal for portioning ganache for truffles, preventing the chocolate from melting in your warm hands.
- Melon Balls: A sharp-edged metal scoop cuts through cantaloupe and watermelon easily for fruit salads.

Maintenance and Troubleshooting
Even the best scoops have limitations. The most common cause of scoop death is hard, chilled dough. If your dough is rock hard from the fridge, do not force the scoop into it. The resistance can snap the wiper arm or strip the gears. Let the dough sit at room temperature for 5 to 10 minutes to soften slightly before scooping.
Cleaning Tips
While many stainless steel scoops are labeled “dishwasher safe,” hand washing is safer for the longevity of the spring mechanism. Dishwasher detergents can be abrasive and may eventually cause the spring to rust or seize up. If you do use the dishwasher, place the scoop on the top rack and ensure it is thoroughly dried immediately after the cycle.
The “Sticky Dough” Problem
If you are working with particularly sticky dough (like macaroons or gluten-free blends) and the wiper isn’t releasing the ball cleanly, try dipping the scoop in a glass of warm water between every few scoops. This creates a thin barrier that helps the dough slide out.

Buying Recommendations
When you are ready to purchase, categorize your needs based on how often you bake and what feels comfortable.
For Comfort and Ergonomics: Look for scoops with rubberized grip handles. Brands like OXO Good Grips dominate this space for a reason. They utilize a squeeze mechanism that distributes pressure evenly across the palm, making them the superior choice for high-volume baking or anyone with hand pain.
For Commercial Durability: If you want the tool a professional pastry chef uses, look for all-stainless steel scoops with a squeeze handle or a thumb press, often found in restaurant supply stores. Brands like Vollrath or Jenaluca are industry standards. These have no rubber to degrade and are built to withstand thousands of cycles, though they may feel colder and harder in the hand.
Skip If: Avoid plastic scoops entirely. They are rarely strong enough to handle cookie dough. Also, be wary of multi-packs sold at very low prices; often the alignment of the wiper is poor, leading to frustration right out of the box.
According to extensive testing by America’s Test Kitchen, the key differentiator between a frustration-free baking session and a broken tool is often the gear alignment. Investing a few extra dollars for a reputable brand usually pays off in years of service.
Frequently Asked Questions
What is the best size scoop for standard chocolate chip cookies?
The #40 scoop is the gold standard for most homemade cookie recipes. It holds roughly 1.5 to 2 tablespoons of dough and yields a cookie that is approximately 3 inches in diameter. If your recipe says “drop by rounded tablespoon,” the #40 is the tool you need.
Can I use a cookie scoop for ice cream?
Technically, yes, but proceed with caution. Cookie scoops rely on a small metal wiper to eject contents. If the ice cream is rock hard, the force required to scrape it can bend the wiper or snap the gear mechanism. Ice cream spades or scoops designed specifically for frozen desserts are usually cast as a single piece of metal to withstand that pressure. If you must use a cookie scoop, let the ice cream soften slightly first.
My scoop feels stiff and is hard to squeeze. Can I fix it?
Stiffness is often caused by food residue drying inside the gear mechanism or the spring losing lubrication. Soak the scoop in warm, soapy water to dissolve any sugars trapped in the gears. After drying it thoroughly, apply a tiny drop of food-safe mineral oil to the pivot point and the spring. Work the handle back and forth a few times to distribute the oil.
How do I know what size my current scoop is?
If the number isn’t stamped on the wiper or handle, you can determine the size by measuring the volume. Fill the scoop with water and pour it into a measuring spoon. If it holds 1 tablespoon, it is likely a #60. If it holds 3 tablespoons, it is a #20. Alternatively, count how many level scoops it takes to fill a quart measure (32 oz) to find the specific “scoop number.”
Disclaimer: Product prices and availability change frequently. Prices shown were accurate at time of writing but may have changed. We may earn a small commission from purchases made through links on this site, at no extra cost to you. Always verify current pricing on the retailer’s website before purchasing.


Leave a Reply